Friday, 20 September 2013

New Die Releases at The Stamps of Life

There are two new exclusive Die set releases today over at The Stamps of Life!
Here are a few cards made using one of the new die sets, 'Talk Bubble Dies' - check out the video showing the new die releases, and also the Gallery, for more card ideas.
I really like this die set!! It coordinates with one of Stephanie's stamp sets (talk4phone) and is really versatile.

My first card is a Flip-its, and I used a square Movers and Shapers die to cut a window in the centre, then die cut two speech bubbles, so that they sit back to back on clear acetate, which I put in the window.
 I also love the dictionary definition stamps, which are from another TSOL set, 'dictionary4me'.

The next card has a simple clear embossed and die cut 'hello', on a background stamped with TSOL's 'chevrons2stamp'.

Finally, a card which uses one of the new Talk Bubble dies, along with a great TSOL stamp set, called 'phone4you'. I stamped the lovely vintage phone onto patterned paper, and cut it out by hand, then just added some embellishment bits.


Tuesday, 17 September 2013

Christmas Sizzix Easel Card

 I've loved seeing some of the Flying Easel cards recently - in particular Karen Burniston's, and the cards she links to in this post on her blog. (She also has a tutorial, if you are interested in making your own.)
I thought I'd have a go at making a Christmassy one. I'm sad it's such a dull day today, because this is a sparkly card! Oh well, hopefully you get the idea of it.
I cut the card base with Karen's Pop 'n Cuts A2 card die, and followed the instructions on her blog - which basically involves cutting an opening with one die (I used the majestic Labels Sizzix Framelits), then using a larger die, to cut half a frame around the smaller opening. When you bend the top half of the card in half, the frame bit sticks up.
I made an extra frame in silver glitter card, to stick on top, and stuck two little bits of co-ordinating card on the card base, to stop the folded-over bit from slipping forwards.
The card still folds down flat, depending on what you decorate the card with, and it makes a really pretty window through to the card floor. I made some quite stiff dimensional snowflakes though, so mine won't fit in an envelope, but it would be easy to hang something in the window which is flat, or can fold flat.
For my snowflakes, I trapped some cotton in between the the silver glitter frame, and the cardstock frame behind it, and added some sequins, glued back to back. Each snowflake is made from 3 die cuts (from Marianne Creatables), folded and glued, with a folded silver sequin glued in the centre of each.
I had fun decorating the rest of the card then, with more snowflakes, paper flowers, and swirls and greenery cut from Tim Holtz's festive Greenery die. I used Tim Holtz Crinkle Ribbon for the bow, using Beacon's glue to hold the drapey bits in place.
For the floor of the card, I used Karen Burniston's Fancy Frame Bigz die, and an old sentiment stamp, embossed with silver embossing powder. (That embossing powder always reminds me of my Granny - it was my first ever embossing powder, which she bought back from a trip to America, for me. I'd never even heard of it before - this was probably 20 or so years ago! Good memories! My Granny's been dead for 8 years - I know she'd be chuffed to know I'm still getting good use out of it!)

Some of the products used:


Wednesday, 11 September 2013

Eileen Hull's 3D Birdhouse - Halloween Design

While I had all my Halloween craft stuff out, I had a go at making an Eileen Hull's 3D Birdhouse into a mini Halloween-style house.
I cut the house base from Tim Holtz paper, and inked up all the edges. Before assembling the house, I cut little windows in it, using the Sizzix Base Tray, and a couple of dies from The Movers and Shapers 'Mini Openings' set.
I added some sections of Tim Holtz's new Cobwebs die, a circle punched moon, cloud from Papertrey Ink, and Movers and Shapers Bats.
I stuck vellum inside the windows, and put a battery tea-light inside the house (you can kind of see the glow in the top window!)
 The swirls on the side were cut with My Favourite Things 'Fancy Flourish' die.
 I also added some black Tim Holtz Distress Ink, in splodges to the roof and sides.
 For the house front, I hand cut some little hinges and a door, which I used a Stampin' Up woodgrain stamp on. The little key plate is a brad. I drew some little stones for the window sill.
A note on my adhesives. I used the ATG (pink glue tape gun) for the flaps on the house - really strong. For the bits I need to have dry quickly, and by just a small edge (like the bat and moon onto the edge of the roof, and cobweb under the eaves), I used Beacons 3-in-1 glue. It's very sticky, grabs instantly, and dies very quickly. It also holds heavy items well.
For detailed gluing, I use glue pens such as Martha Stewart's Fine Tipped Glue Pen or those by Zig.
Finally, I used little square adhesive foam pads for the door.
These four kinds of adhesive are my absolute staples which I use on virtually every project I do.

Some of products:


Tim Holtz & Karen Burniston Halloween Accordion Album Card

I'm not really a big fan of Halloween - it simply wasn't something anyone 'did' where I lived growing up, and not many people I know now really decorate their homes or send cards etc. 
I do seem to have acquired a few Halloweeny stamps/dies/papers though (fancy that!) and I think they are quite fun, so I had a lovely time this morning putting this Karen Burniston Accordion Album together.
I used Karen's Frame & Label, Bracket die, for the inner panels (the orange shape, below), and for the outside frames.
On the first section, I used papers from Echo Park's 'The Apothecary Emporium' 6x6 pad, and Teresa Collins' 'Vintage Finds' 6x6 pad. The 'beware' stamp is from Purple Onion, and I heat embossed it with clear embossing powder. I used various stamps on the background, and added Tim Holtz die cuts - cobwebs (which arrived in the post this morning!) and bats.
I also used Tim Holtz black Distress Paint, and splodged it on, like ink (or blood!) splats. I added some glossy accents to parts of the splots, to keep them shiny. Lots of Distress Ink round the edges of everything.
 For the second section, I used the Sizzix/Hero Art Chandelier set of stamps and dies, plus a little cobweb one I've had forever. I added Crackle Accents, and more black Distress Ink and Glossy Accents to various bits, and more large cobweb diecut.
Third section: I used Karen's Fancy Frame Bigz die, and used white embossing powder on a Tim Holtz sentiment stamp in the centre, then covered it partly with Crackle Accents. The swirls are from Tim's Festive greenery die, and I used a couple if his cogs. More paint splots with Glossy Accents.
Last section: I cut the skull out in the Sizzix Base Tray (before sticking the sections together) and covered the back with an extra panel of paper, which I stuck the eyes/nose to. I also used the bird from the Mini Bird and Cage Movers and Shapers set, and added Crackle Accents to it. The crown is from Teresa Collins, and I glued the gems on.
I'm sure I'll find some vaguely-Halloween-keen friend to give it to!
I have put it in the 'Layers' Country View Crafts challenge, and Penny's Paper-Crafty Challenge Blog, 'Anything Goes' theme. I've also put it in Simon Says Stamp Monday Challenge - this week 'Embossed'.

(A little later...)
Yay! I was awarded a Top 3 spot at Penny's challenge,
and also chosen for the spotlight at Simon Says Stamp!

Some of products used:


Saturday, 7 September 2013

Pop 'n Cuts & Cricut Male 40th Birthday Card

Scott and I are going to a 40th birthday party tonight, of one of his friends from his teenage years, who has recently moved to the area.
For the card, I used Karen Burniston's A2 Pop 'n Cuts base die, with the Congrats insert. I also used the Congrats Sizzlit for the nice layer piece.
The '40' was cut with Cricut 'Base Camp' cartridge - an oldie, but a goodun!
 I added an extra pop-up part to the shelf above the Congrats bit, by cutting 2 slits, and bending the section between, outwards. I stuck the '40' to this bit.
 For the bunting, I used Tim Holtz's On The Edge Pennants die. The bottom row of bunting is part of the main chevron paper layer, and I laid a wedge shaped piece of burgundy cardtock on top, to make it look separate, before laying another row of bunting on top at an angle.
I added the 'Andy' using Tim's 'Typeset' die.

Some of products used:


Eileen Hull's Sizzix Canning Jars Gift Holder

It has been a manically busy week - so much for having a rest once the kids went back to school!
I took a while this morning though to make this little gift holder, using Eileen Hull's Scoreboards Canning Jars die.
I cut two of the large jars from mountboard (very thick cardboard bought from a picture framers), plus the middle piece which bends and makes a little holder section in the middle. The die is great, because it cuts thick material with ease, and puts in perfect score lines so it's beautifully easy to fold the pieces where needed.
I then cut more pieces from patterned paper, and glued them to the mountboard pieces, front and back.
I cut an extra mountboard lid, and cut off a section from the top of it, to imitate the old-fashioned metal screw tops of Kilner jars. I painted it with silver Tim Holtz Distress Paint.
 I thought it might be nice to have a window in the jar, so you can see through to the little treat inside (in this case red jelly beans and midget gems!)
I used Karen Burniston's Movers and Shapers Heart & Wings set, by placing the front canning jar piece face up in the Sizzix Base Tray, and laying the Heart Movers and Shapers blade down, on top.
 I then glued some acetate sheeting behind the heart opening, and trimmed off part of the flaps from the centre mountboard piece, so that they couldn't be seen through the window. 
I inked the edges of the separate pieces, then stuck them together with my ATG gun.
I put some sweets in a mini grip-seal bag, which fit into the centre space perfectly.

Products used:


The Stamps of Life Extra Set Release

So today there is a new stamp set being released by The Stamps of Life called 'extra4lights'.
The set has some great Christmas light fill-in stamps (especially love the chevrons!), and lots of additional sentiments, which extends and gives more variety to this month's Stamp Set of the Month - 'lights4Christmas'.
Here are some cards using a mixture of the the two sets, and the Lights die set:

Tuesday, 3 September 2013

Vintagey Sizzix Accordion Album Card

I did enjoy making this card this afternoon... I like the look of the chalkboard effect that is around at the moment, and wanted to have a go myself. This was a pretty simple card really, with the black cardstock panels (cut with Karen Burniston's Frame & Label, Bracket die) just having one stamped image on each. I cut four pink sections with the Accordion Album die, and added the outer frames, again using the Frame & Label, Bracket die.
 I liked the idea of adding an embellishment to each section, all made with pages from an old Sherlock Holmes book.
The first section has a stamp from October Afternoon 'Five & Dime' set, and flowers cut with Sizzix 3-D Flowers Bigz die. I'm quite proud of these flowers - they took me a while to make, as I have definitely NOT got the hang of putting them together yet. (Maybe some nice person will have put a Youtube tutorial together on how to do it more quickly - will have to go and check...) Leaves cut by hand.
I stamped with VersaMark watermark ink, and added Stampendous 'Detail White Opaque' Embossing powder. The images come out really beautifully crisp, but I grungied them up a bit with a stick of chalk.
The background paper has the most wonderful pattern of vintage bathing suits on it (I think it's by Webster's Pages), but I didn't fussy cut it very well, so you can't really see how cool it is.)
 The second section has a Tim Holtz stamp on from 'Way with Words' set, and birds (which I first mounted onto thicker cardstock) cut with Karen Burniton's Birds on a Wire die.
 Third section: a stamp by Personal Impressions - Beryl Peters Collection (this might be really old - I bought it on ebay a couple of years ago), and some handmade bunting.
 And the last section has another stamp from the October Afternoon set, and a bow which I am also quite pleased with. I don't have a bow die, and cut the sections for it myself.
I've given the card to my daughter - it is her one year anniversary today of having Type 1 Diabetes... we kind of reckon 3rd September should be like a second birthday for her - the birthday of her Diabetes, but a celebration for having successfully kept her alive for the previous year!

Some of products used:


Monday, 2 September 2013

Sizzix Pop 'n Cuts Butterfly Window 13th Birthday Card

 For some strange reason, I spent most of today having a massive spring clean of all the kitchen cupboards, and my craft stuff - not at all what I had planned! I was supposed to make a birthday card for my niece, but ended up doing it in 15 minutes I had while tea was cooking... I love how Karen Burniston's Butterfly Window insert (in the Square Pop 'n Cuts base die) makes for such a fast card!
 I used the Edge & Scroll Bigz die to make the bright pink fill-in bit. (I folded the pink cardstock in half, and put the folded edge along the inside of the straight cutting edge, so it makes a single folded piece the right size.) I also used the Butterflies & Labels Bigz die, to cut the blue butterfly layers.
Sorting out my craft stash today, reminded me of some things I had, including the Bazzill edges (pink scallops), various brads, and very old paper and fabric flowers! And talking of old, I used some Sizzix Alphabars Doodle Tag Numbers, for the '13'. I've had those things donkey's years!
The alphabet is a new one which I love, from Die-namics 'By The Letters'.

Some of products used:


Sunday, 1 September 2013

'The Stamps of Life' New Release

 A little while ago I was delighted to be invited to join the design team for Stephanie Barnard's 'The Stamps of Life'!
The company makes good quality clear stamps, as well as many exclusive coordinating dies and other craft products, plus sells Stephanie's range of Sizzix dies. There is a Stamps of Life monthly club, which sends a new stamp set out to members at the beginning of each month, (plus other perks throughout the year!) and I should also mention the brand new 'Die Hard' club, for club members who wish to receive a coordinating die set each month too... be warned though that there is a waiting list in place for this at the moment, due to such a high initial demand.

So, this month the new club stamp set is called 'lights4christmas'. 
Here are some cards which I made using the new stamps, and co-ordinating dies. You can find plenty more ideas incorporating each of The Stamps of Life stamp sets, in the gallery.

For the first card, I stamped the fairy lights bulb three times, and coloured the images with Copic pens. For the wire, I wound some thin wire around a pen, and flattened the coil, then stuck it down with Beacon's 3-in-1 craft glue.

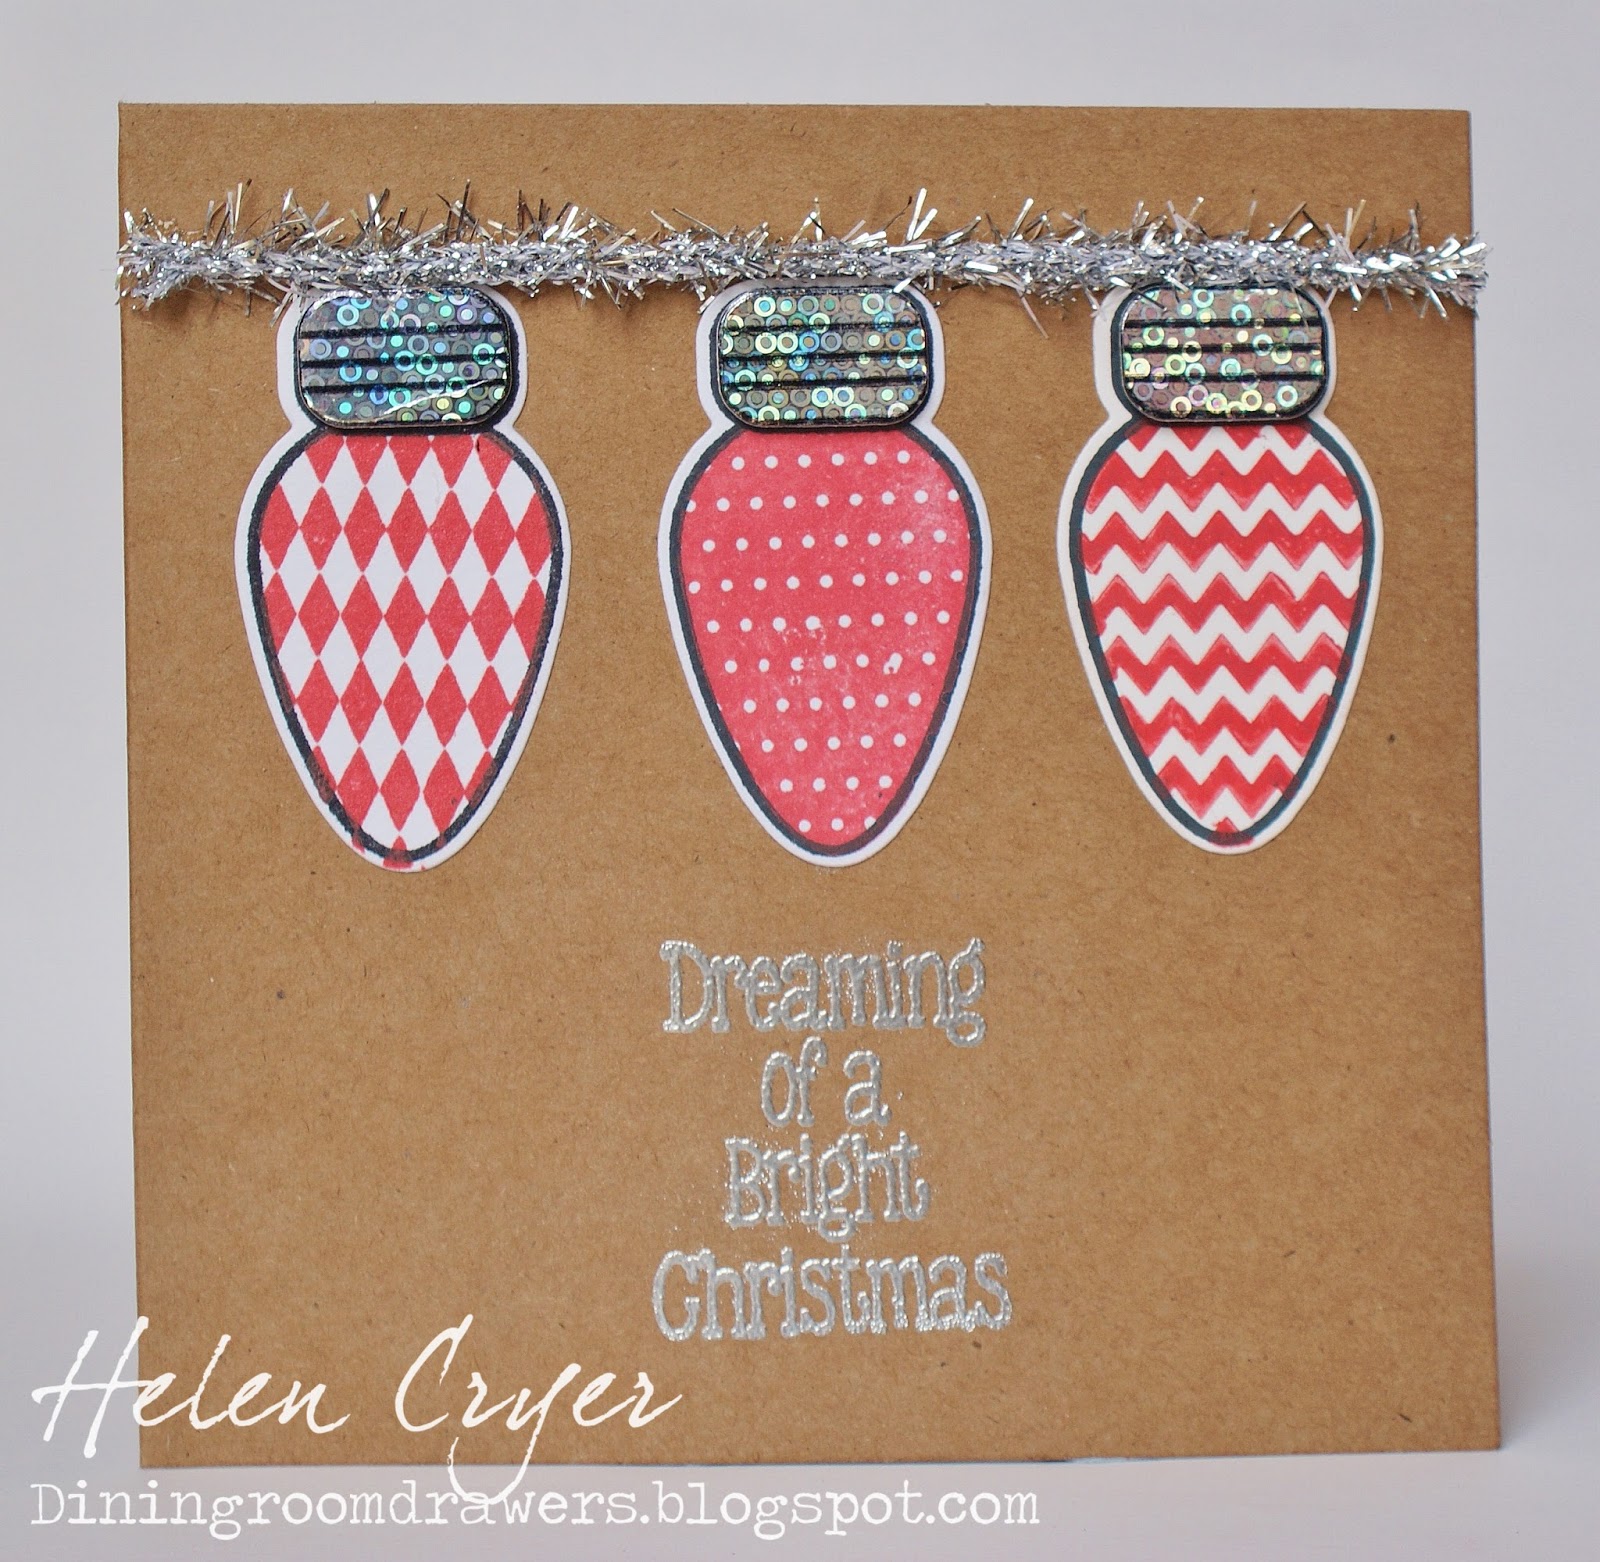
 My next card uses some Tim Holtz tinsel for the fairly lights wire, and, as well as die cutting the whole of the lights, I also die cut just the bulb parts too, and stuck them on with foam pads. The bulbs were heat embossed with glittery embossing powder, and I added hand cut 'reflections'.
I like how The Stamps of Life die sets often have dies in them for the various different stamped elements, not just one outline die.

Another quite simple card, with a dry embossed background, and using the separate dies for the bulbs and screw parts.

And finally a card using the Fancy Frame Flip-its die, with a single bulb, heart cut from Sizzix Owl #2, and frames from Sizzix Framelits Fancy Frames #5.
The back of the flip-open part, with another of the sentiments from the stamp set.
(Excuse the drastically disappearing photo... I was experimenting with blurring edges on Photoshop the other night!)