Sunday 30 November 2014

Sizzix Triple Circle Flip-its and Purple Onion Design Christmas Card

I loved making this card - really simple and fun! I used the Triple Circle Flip-its card from Sizzix for the card base, and to cut the patterned paper layers, then I used the slot dies from the Lucy Label Pop Up Card set, to make little slots to thread the ribbon through.
I coloured my stamped images with Copics, cut them out with Cutter Bee scissors, and stuck them down with foam pads. I added a few details with White Signo Uniball pen.
Finally I added a tag from Sizzix's new Framelits Tags and stamp set.


All the stamps are from Purple Onion Designs, who currently have a brilliant sale on, with 25% off ALL STAMPS till 10th December. They also have a selection of stamps with even more off, in the Black Friday-Cyber Monday Sale!!


Some of the products used:


Saturday 29 November 2014

Purple Onion Designs' Stacey Yacula Stamps & Copic Airbrush - Snowy Winter Night Christmas Card

A short while ago I treated myself to a new toy - the Copic Airbrush system (Set 1), and some masking film (I'll do a post at some point with more details about the airbrushing set and techniques), and this is my first card using it.
I stamped the background scene first, then masked it out, and airbrushed the sky. After peeling off the masking, I added some colour to the house, snow and trees with Copics, and then added the snow, using a Frantage set (I sprinkled chunks of embossing powder on, then heated them from underneath, so they didn't get blown off.)
I then added some glitter to wet glue, and added a hand-cut bunny on foam pads.
The sentiment is on a Tim Holtz banner.

All the stamps are from Purple Onion Designs, who currently have a brilliant sale on, with 25% off ALL STAMPS till 10th December. They also have a selection of stamps with even more off, in the Black Friday-Cyber Monday Sale!!


Here's a close-up showing some of the different textures in the card, a bit better.
I'm pretty excited to have a go at some more airbrushing anyway!

Some of the products used:


Saturday 15 November 2014

Purple Onion Design Stacey Yacula Stamps & Pop It Ups Skating Christmas Card

Here's a card I made using some more of Stacey Yacula's beautiful new stamps for Purple Onion Designs. I wanted to create a 3D ice skating pond scene, with some of the characters, and the Pop It Ups 'Lots of Pops' die.

I cut out the blue card base with the Sizzix Pop n' Cuts Card with Ornate Edges die, then added the background pond scenery by stamping the Pond stamp a few times onto patterned paper, and cutting out the parts I wanted.
I added Stickles to some areas.
I stamped the sky with A Dusting of Snow stamp, and added some details to the snowflakes with Liquid Pearls.
The character stamps were coloured with Copics and cut out with Cutter Bee Scissors.

I also added a border from the Merriness stamps set, along with some red glitter dots, white Uniball Signo pen, Liquid Pearls and Copics, and added a sentiment I wrote with a dip calligraphy pen and ink.


Some of the products used:


Tuesday 11 November 2014

Karen Burniston's November All-White Challange Pop It Ups Christmas Card

 Today I have another card for Karen Burniston's November Designer Challenge - to use only one colour on a card (either red, blue or white). She has so many beautiful dies which can be used for Christmas themed cards, I had to have a go at doing an all-white snow scene Christmas card.

I used the Evergreen Pivot Card die to create the central pop out part of the card, and all of the tree layers. After die cutting the pivot, I ran the card three times through my Big Shot in Karen's new Clouds embossing folder ( - this is a gorgeous new embossing folder, if you haven't seen it yet!)
I then used the pivot die again on some separate card, and snipped out just the central tree part, and stuck it over the embossed trees on my card, because I wanted them flat.

Next I added some layers to the card using the little trees die and wavy die from the Outdoor Edges die set. The lower layers I stuck on with foam pads.
I then stuck on various trees, some of which I embossed with the patterns in the actual tree die cutters, and some with the Lots of Dots embossing folder from Elizabeth Craft Designs.
I made one of the trees into a Christmas tree, with the ornaments die from the Evergreen Pivot Card set, and the string of lights from the Holiday House set.
The little wooden sign I cut out by hand, and wrote the sentiment on.

On the other side of the card I added the Holiday House, along with a hand cut path, and glued on some oval gems to each light. Then I stuck on some layered snowflakes with foam pads, adding adhesive gems. For the tiny sections of the card which I stuck on with foam pads, I just cut the little square foam pads in half.

The clouds embossing folder also worked fine on the card front, so I just added a few snowflakes and some trim. The pearls and diamonds are on a natural coloured fabric, so I covered that with embossed card stock.
Donna Wright (who is also on Karen's Designer Challenge Team) and I were out shopping a couple of weeks ago in a haberdashery department, and we saw this trim. She wasn't very keen on it, but I was determined to use it on a snowy card like this one... it should make Donna laugh to see it!

Some of the products used:


Monday 10 November 2014

Blue Butterfly Pivot Card for Karen Burniston's November Designer Challenge

Our Designer Challenge from Karen Burniston this month is to make cards which only use ONE colour - either Blue, White or Red (plus a little bit of accent if needed.)
I opted for blue, and made this card with the Butterfly Pivot Card die set, and the Butterfly Accessory Dies set, from Elizabeth Craft Designs.

I took some blank card stock, rounded the corners, and stamped it with Versamark ink, and a Damask background stamp from Purple Onion Designs.
I then used the Butterfly Pivot die, filled in the spaces in the middle of the card left by the die cut, then cut out loads of butterflies from blue vellum, glitter card and papers from Graphic 45's Botanical Tea Collections 6x6 and 8x8 pads.

I layered up the butterflies, and stuck most of them on with adhesive foam pads.
I used another Purple Onion Designs stamp for the birthday sentiment, and used Versamark ink again, with silver embossing powder and a heat tool. 
(I tend to do my heat embossing on separate pieces of card stock, because it always seems to warp the card a bit - then I can attach it and get it pulled straight again. If anyone has any tips for not warping card stock when heat embossing, I'd love to hear them!)

You can kind of see here, how I attached extra butterflies to the two big pivoting butterflies, to try and get more of a 3-D drift of butterflies effect.
I then added a few adhesive gems.

The card front. I stuck a butterfly in the top right-hand corner, to cover the back of a butterfly on the inside.
I glued on a metal charm to a ribbon border, with Beacon's 3-in-1 glue.

Some of the products used:


Sunday 9 November 2014

Sizzix Happy Birthday Owl Card & Action Wobble Spring Tutorial


 I absolutely loved this Sizzix Thinlits Owl die set when I first saw it, and it sat on my secret Pinterest Wish List for a couple of weeks before I succumbed! I also loved the Little B 'Block Out' die set, which I used for the 'Happy Birthday' on this card. I'd never heard of the Little B company before, but the storage and dies are both great! This set comes with 18 different word dies, which you can position anywhere!

I made this simple card, with papers from We R Memory Keepers Chalkboard 6x6 pad, and the owl is attached with a homemade Action Wobble Spring.
I made some of the owl elements stick out even more with adhesive foam pads.

I've seen on a few cards now, a way of attaching bigger embellishments, or card centre pieces with something called an Action Wobble Spring. It's pretty self explanatory - the whole part attached with one of these bobs around a bit, and looks cute! I had a look on the internet for some, and they are quite pricey (here in the UK at least), so I tried making my own.

Here's the stuff I used...

I used 26 gauge wire (because that's just what I happened to have), and I wrapped it round a Sharpie pen about 3 times, and cut it off with scissors.
 
 I used a circle punch to cut out two quite stiff card stock circles, and sellotaped the bottom half a curl of wire onto one of them.

Then I put the other circle on top of the wire, and put another bit of sellotape over the other end of the wire (again, about half a curl). I kind of slid the sellotape in, whilst keeping the two circles approximately lined up like this.

Here's my finished springy thing! It just needs glueing to your card, plus embellishment.
It works pretty well! My owl jiggles around very nicely when the card is moved slightly, and the wire seems to be holding its shape well. Also, because the wire is so lightwieght, the sellotape seems more than sufficient to keep it in place.

Here's a very similar card, just made with different papers (from American Crafts Dear Lizzy 4th & Frolic 6x6 pad.)

...and look at that cool shadow!!

Some of the products used:


Friday 7 November 2014

New Releases from Stephanie Barnard for The Stamps of Life & Sizzix

There have been some fun new additions to the products at The Stamps of Life recently! I have quite a lot of cards to show you today, using them...

First off, there is a new stamp set, which I love, called 'ribbonbanner2stamp' which comes with dies. The ribbon stamp is separate from the word stamps, so you have lots of options. Here I teamed it with the Circle Flip-its #4 card die.
I did my stamping with Versamark Ink, and used white embossing powder on it and a heat tool.

The same stamp set, this time with Mini Flower Dies from The Stamps of Life, and the Sizzix Elegant Stand-ups card.

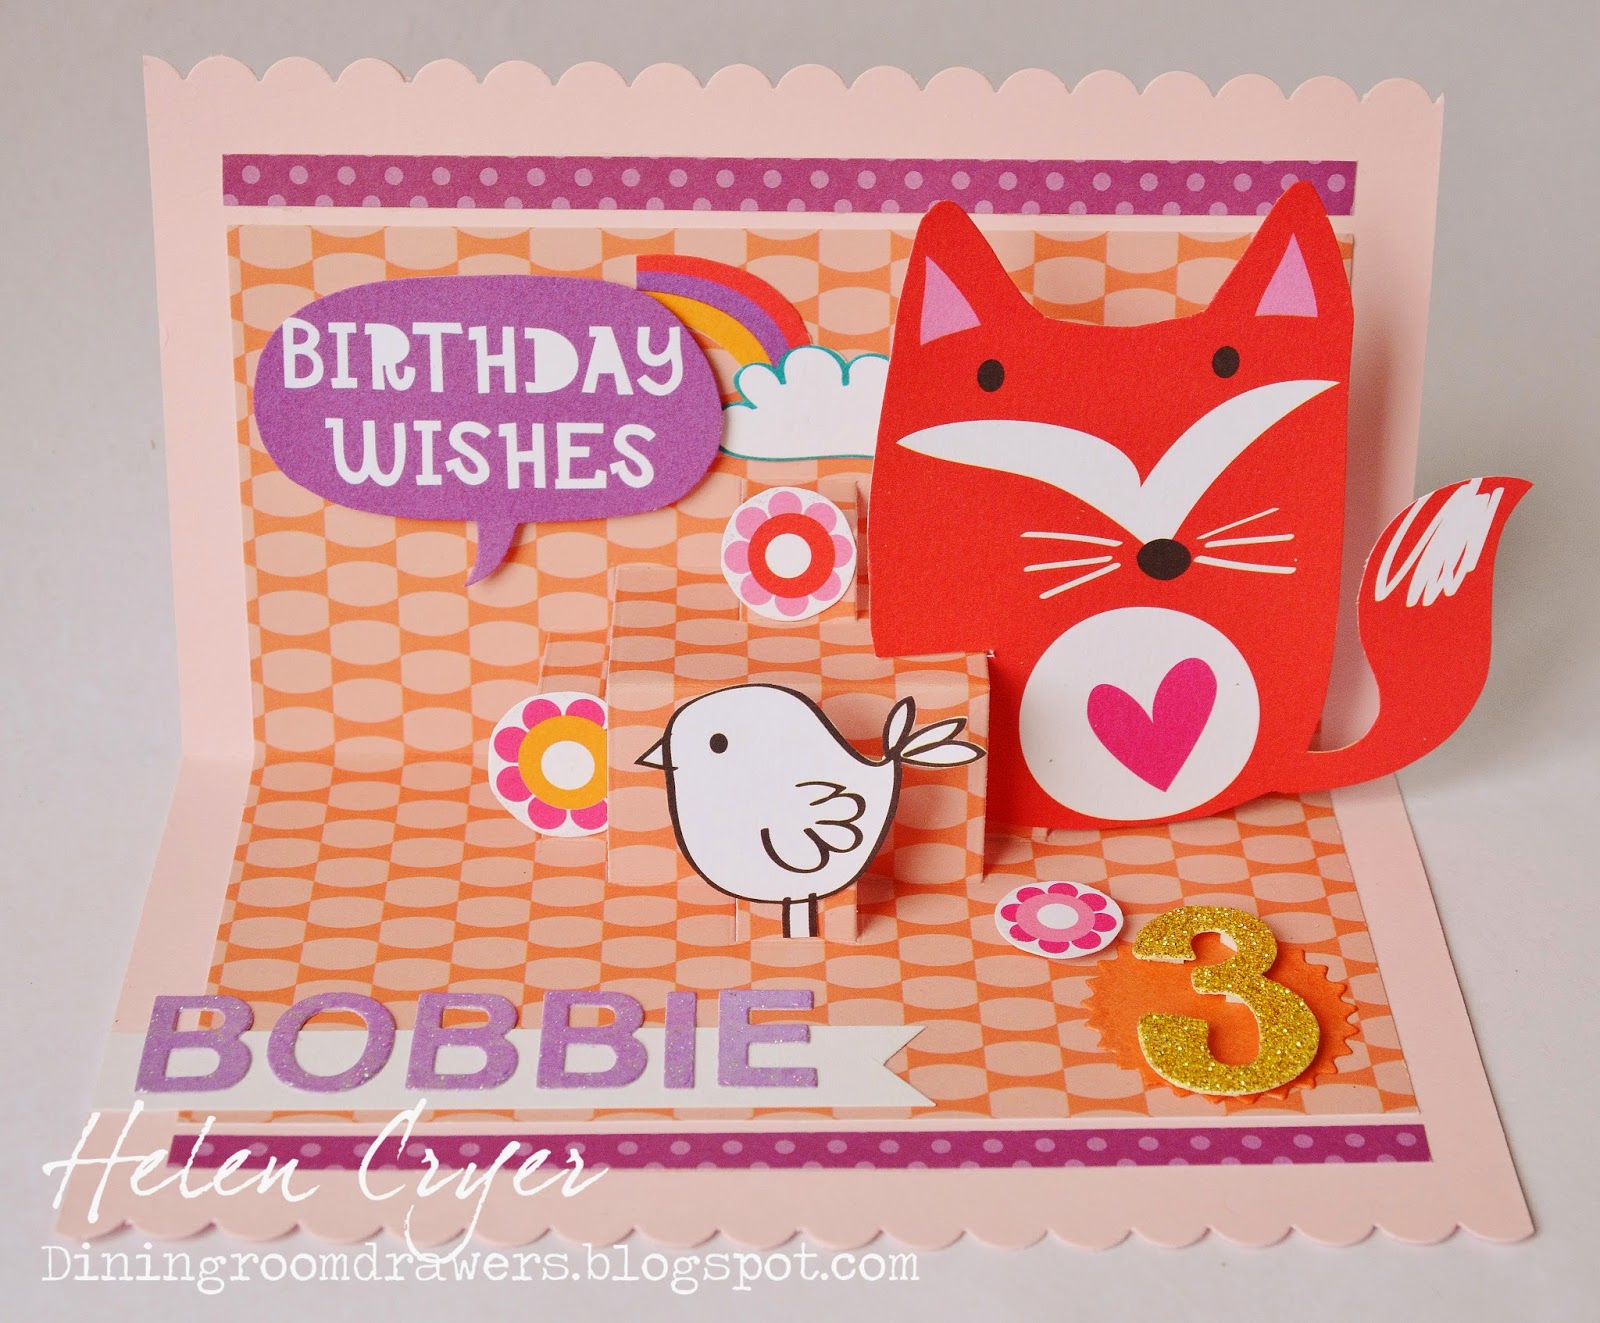
Here I used the 'ribbonbanner2stamp' set for the 'Happy Birthday', and Crayon dies from The Stamps of Life, with the Sizzix Elegant Flip-Its card.

Another recent release is a stamp set by Stephanie Barnard, for Sizzix, which is a great assortment of 'Happy Birthday' sentiments, which I used here on the Elegant Flip-its card, along with a cupcake made from the Sizzix Framelits with Stamps - Ice Cream set.

Another fun release of Stephanie's for Sizzix is the Framelits with Stamps - Windows set, which cuts out a great grid/window, plus has loads of smaller stamps and dies. Here I used the cut-outs left from the grid, and made a kind of ombre card, with some of the smaller stamps and dies.

Here's the window die set being used again, this time with the Happy Birthday, which comes with Sizzix's Regal Stand-Ups Card die set.
 Another pic of it, showing some of the dimension.

And finally, another release today at The Stamps of Life is the 'brushstrokes2stamp' set and matching dies. Here are some cards I came up with for it...

I used the Square Flip-its #2, and crayons2stamp set as well, on this one.
Well I hope that gives you some idea of the new products by Stephanie Barnard, plus some inspiration for them!

Some of the products used:


Sunday 2 November 2014

Lots of Pops 3rd Birthday Card

I just wanted to share with you this quick card I made for my niece Roberta - 'Bobbie'!
I used the Lots of Pops die to create the pop out platforms, and used some images I cut from a printed birthday card (it came with some wrapping paper I had bought - I liked the images, but wanted them to stand up!)

I used some Cosmo Cricket paper for the background, and used a Stampin' Up border punch for the scalloped edges. You can see the layers better in this picture. I cut a slot in the fox, so he wouldn't stick out so far.

I used a Stampin' Up alphabet die set for the glitter letters, and the old Sizzix 'Fun Serif 'number set  for the '3'.
So, quite simple, but basic cutting and sticking is so therapeutic!

Some of the products used: