Sunday 31 August 2014

Elizabeth Craft Designs Monthly Challenge - Waterliles Ring Accordion Card

 The August Challenge for our Elizabeth Craft Designs Team is to create an Asian themed project.
I love the Waterlilies peel-off stickers by ECD, and decided to do a triple ring accordion card with them.
I cut the coloured ring panels, and embossed them with ECD's Damask embossing folder, then used the Ring Accordion die to cut Shimmer Sheetz centre panels in matching colours.

 I stuck the peel-offs onto watercolour paper, and coloured them with a waterbrush pen, and some Tombow Dual Brush pens. When they were dry, I cut them out and stuck them to the Shimmer Sheetz with little foam pads.

The card front.

Finally, I used a Sizzix stamp with VersaMark ink and gold embossing powder for the sentiment.

Some of the products used:


Saturday 30 August 2014

Crazy 4 Challenges Stampin' Up Flower Punches Birthday Card

My final challenge as hostess this month at Crazy 4 Challenges, uses a shabby chic picture for inspiration, and here's my card based on it.
I used a Stampin' Up woodgrain stamp for the background, and three Stampin' Up flower punches to make the layered flowers.
I inked the edges of each flower, and shaped them a bit using a ball tool, leaning on a stiff foam pad.
I hand cut the larger leaves, and used a Martha Stewart punch for the smaller leaves.
The buttons are from Stampin' Up, and the swirls are a MFT die.


I used a die and a stamp by Tim Holtz for the sentiment banner, and finally, glued on some sequins.


Links to some of the products used:


Thursday 28 August 2014

Purple Onion Designs Camera Sizzix Flip-its Birthday Card & SALE!

I just wanted to remind you that Purple Onion Designs have a 25% off ALL STAMPS Anniversary Sale on at the moment, running till 31st August!! 
The stamps I used on this card are all from Purple Onion Designs.

I also used the Sizzix Regal Flip-its die for the kraft cardstock base, and the co-ordinating Regal Labels Framelits die set for the pale pink paper layer.
I stamped the camera image onto some different papers, and just hand cut out different parts and layered them up with foam pads.


The papers are from American Crafts' Flea Market 6x6 pad.


Some of the products used:


Monday 25 August 2014

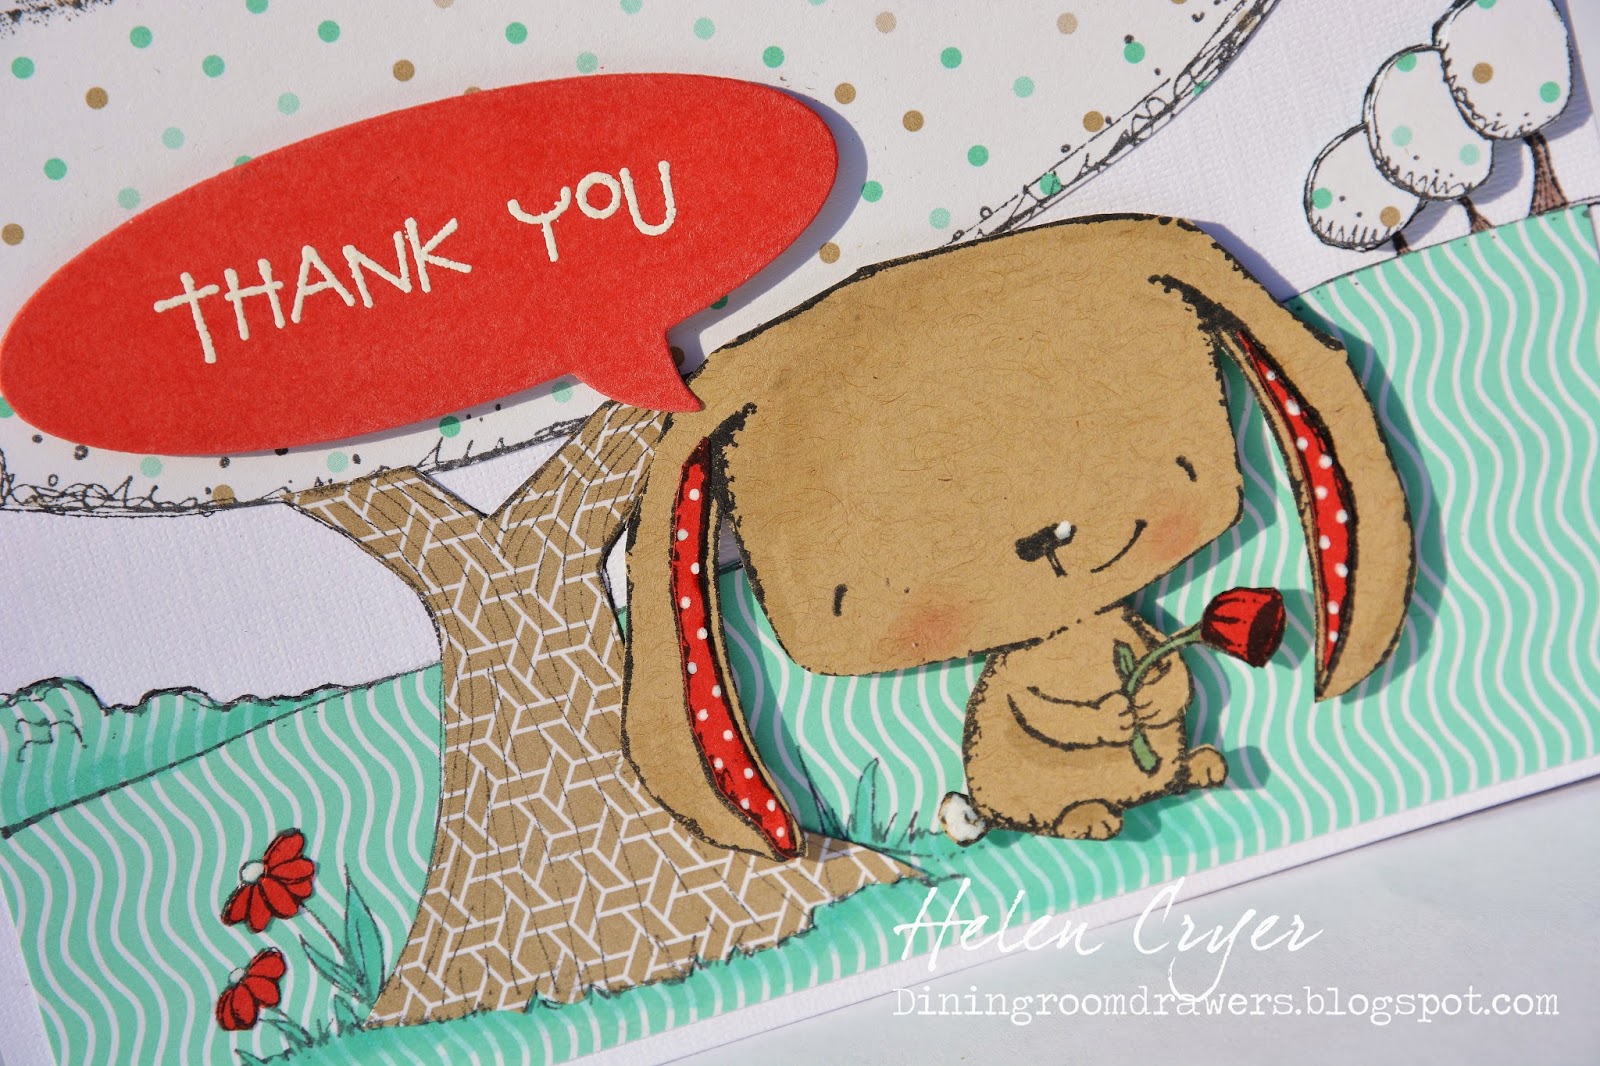
Stacey Yacula & Purple Onion Designs Stamps Thank You Card

Hello! Here's another card using stamps all from Purple Onion Designs - and a reminder that they have their Anniversary Sale on at the moment, with 25% off ALL STAMPS till 31st August!


I stamped onto various Stampin' Up papers, and kraft cardstock, then cut out the various elements and layered them up.
I stamped the sentiment with VersaMark ink, then heated up white embossing powder on it.
The speech bubbe die is from Stampin' Up.
I added a few subtle shadow details with Copic pens, and a few white details with white Signo Uniball pen.


Links to some of the products used:


Saturday 23 August 2014

Elizabeth Craft Designs Crystal Flowers Spiral Circle Pull Card Tutorial

Hello everyone! Today I'm on the Elizabeth Craft Designs blog with a Spiral Circle Pull Card tutorial for you. 

I was browsing through my patterned paper pads, and a turquoise and gold paper caught my eye, and was the inspiration for this card. Someone asked me a while ago where I get the inspiration for my cards, and I'd have to say it usually does comes from patterned papers - the colours and style of pattern always seem to create a 'theme' for the rest of the card.

DSC_0518

Directions for making the card:

1. Cut out a pale turquoise piece of card stock measuring  5.5'' x 8''. Fold it in half, and open out again.

2. Use the Spiral Circle Pull Card die to create the additional folds and half-circle cut.

3. Cut two strips of patterned paper, each measuring  5.5'' x 1.5'', and adhere them to the outer edges of the card.

4. Cut a piece of pale turquoise card stock measuring 5.5'' x 2.5'', and emboss it using the Trendy Tiles 1 Embossing Folder. Adhere it to the right-hand side of the card, next to the patterned paper.

5. Cut out a large and small flower from turquoise glitter card stock, using the Crystal Flower Set 1. Cut out a large and small flower from gold card stock, using the Crystal Flower Overlay Set 1.

6. Cut a circle from contrasting patterned paper, using the circle die from the Clocks and Gears die set, and another smaller circle using the circle die in the Spiral Circle Pull Card set.

7. Cut another circle using the circle die in the Spiral Circle Pull Card set, from gold cardstock, and then die cut the Thank You Stand Up Helper into the centre of it. Trim away the top half of the circle, so you are left with a piece as shown at the bottom of the picture below.

DSC_0507

8. Glue the centres of the Crystal Flower Overlays onto the glitter flowers of the corresponding size, and add a brad 
through the centres.

9. Adhere the larger contrasting patterned paper circle to the front of the floating circle, and glue the layered flower on top.

DSC_0525

10. Inside the card, adhere the smaller patterned paper circle, with the 'Thank You' piece on top.

11. Cut four Big Triple Leaf pieces from gold card stock. Adhere two to the card front, and two inside, as shown below.

12. Glue a sheer ribbon bow to the leaf stems on the card front.

DSC_0531 (1280x850)

13. Finally, add some Lace Fan 1 Gold Peel-Off Stickers down the sides of the patterned paper strips, and also below the 'Thank You'.

DSC_0535

Some of the products used:


Crazy 4 Challenges Bird Card & Purple Onion Designs SALE

I'm hosting at Crazy 4 Challenges again this week, and the challenge I set is to use an animal in your card (though no bears or bunnies!)
I decided to use this cute little bird stamp from Purple Onion Designs (as are the bird house and sentiment stamps.)

Talking of Purple Onion Designs - they have a superb 25% off ALL STAMPS Anniversary Sale running from 22nd till 31st August!! I love all their stamps, so take a look!


I used Stephanie Barnard for Sizzix's Fancy Frame Flip-its die set for the card base and patterned paper layers, plus matching Framelits die set for the orange chevron layer.
The speech bubble die is from Stampin' Up, and the papers are from Studio Calico's 'Print Shop' 6x6 pad.
I cut the bird and birdhouse layers out by hand.


Links to some of the products used:


Monday 18 August 2014

Karen Burniston's August Designer Challenge Hoppy The Frog Accordion Card

 Karen Burniston's August challenge for her Design Team is to use any of her character dies... Hoppy, Poppy or Chilly, from Elizabeth Craft Designs.
I chose to use Hoppy on a Fancy Label Accordion card base.

 I made patterned paper frames for the card panels, using the Fancy Frame Edges die set. All the papers are from a lovely 6x6 pad from My Mind's Eye, called 'Oxford Lane'.


  I layered Hoppy with small square adhesive foam pads, and hand cut some 'jump lines' for him.
I also added little bows in each of the corners, using a die from Karen's 'Props 1' die set, and some adhesive pearls.


On the other panel, I cut a label (another die from the Accordion Fancy Label set) and stamped 'hello' with VersaMark ink, then heated some white embossing powder on it. The stamp is from Pink Paislee's 'Hello Sunshine' collection.
I also added a couple of little flies from the Hoppy the Frog die set.


Finally, on the card front I added a checked paper frame, using the Accordion Fancy Frame die to cut it, and snipping away the extra bits.


Links to products used:


Saturday 16 August 2014

Crazy 4 Challenges Stampin' Up Flower Patch Card

I came up with a sketch challenge this week at Crazy 4 Challenges, and here's my interpretation of it, using some of my new Stampin' Up products. 
I love the new Flower Patch bundle of stamps and dies, and also the big dots embossing folder!
The ribbon and inks are also from Stampin' Up.


You can see I used lots of layers with foam pads, for dimension.


I also made this card using the sketch, but I'd forgotten that I made it for this challenge, and posted it on here earlier in the week! Head like a sieve!


New Stephanie Barnard Sizzix Die Releases at The Stamps of Life

Stephanie Barnard has some of her Sizzix die sets newly released at The Stamps of Life today!
 One of her sets is a border set, which I have used a lot - here I've used just one of the dies to create this solid rainbow effect.
I used the shadow 'thanks' die from the Elegant Flip-its Card die set to cut through the card front, and stuck some acetate sheet to the back of the space left behind. I then used glue pen to stick 'thanks' to the acetate.

Cool shadow!

Another of Stephanie's new sets is a die and stamp set which has lots of circular patterned borders and tags. I used some lovely bright co-ordinating Stamps of Life inks, card stock and felt on this card.

And finally, another card with a similar colour scheme, using another of the border dies, plus the Elegant Flip-its die set. I also used the Sizzix Flower and Tags Framelits and Stamps set by Stephanie.

For this card, I folded over approximately a third of some card stock, before cutting it with the Flip-its die, making sure to keep the folded edge just within the die blade. Then I just trimmed off any excess card so that the folded over third fit perfectly inside the card.

Some of the products used:


Friday 15 August 2014

Cards for Kids in Hospital - Minion, Lego, Owl Punch & Baseball Boots Flip-it Cards

Yesterday I got back from a camp which I organise each year for girls from my church across this whole area. I'm completely exhausted, but what a joy it is to spend time with them and also the girls' local youth leaders - such a fabulous bunch of people! 

As well as doing stuff like water sports, archery, a 10 mile hike and tie-dyeing T-shirts etc, I also wanted us to do a service project, so we did some fund-raising for the local hospital's children's unit. I thought it would also be nice to make some cards to give to the children currently in hospital there too.
I came up with four card designs which would be suitable for various aged children, and made card kits for the girls on camp to put together - lots of die cutting and snipping for me the week before last!!

My first design is this Minion one, using the brand new Sizzix Circle Flip-its #4, which Stephanie Barnard was kind enough to send me a while back. I shortened it a bit and rounded off the top edges with a corner punch.
I used various circle dies and punches to make the eyes and buttons, and I hand cut the hair and mouth pieces. I kept the design pretty simple.


The second card I came up with was based on this card by Sam Post which I saw on Pinterest.
I used a Stampin' Up embossing folder for the background, and for the 'Awsome' stamp.
I cuts strips of cardstock for the Lego pieces, and used a small punch for the dots, which were stuck on with small square foam pads.
The 'you' is a Simon Says Stamp die.


I also found inspiration for the next card on Pinterest, in this card by Laura Mackie.
The Owl and heart punches are from Stampin' Up, with a stamp from Sizzix, and I made the scalloped edges by cutting circles from a punch, in half.


The last card I came up with uses a Flip-its card base, with layers stamped with a Stampin' Up background stamp, and the peach layer cut with a Framelits set.
The 'Hello' a die from Lawn fawn, and the baseball boots from My Mind's Eye's 'Boy Crazy' stamp set.


The girls on camp enjoyed making the cards, and then taking them to the hospital and giving them out!


Some of the products used:


Monday 11 August 2014

Purple Onion Designs Card & Overstock Sale

I have another card today, using stamps from Purple Onion Design. The 'Hearts on a String' stamp is on sale at the moment (I love this one!) - as well as loads of other gorgeous stamps, in an overstock sale found here.
I stamped the hearts stamp onto the white background cardstock, then stamped again onto patterned papers and cut the hearts out by hand, using foam pads to stick them down. I added a few white details on the hearts with Signo Uniball pen.

The papers, twine, circle punches and sequins are from Stampin' Up, and I used a Sizzix die set for the zig-zag circle. The mouse was coloured with Copics.

Some of the other products used:


Sunday 10 August 2014

Purple Onion Designs Owl & Bunting Card

Just a simple card today, using the 'Ruby' owl stamp from Purple Onion Designs, and Birthday Wishes stamp which is currently on sale.
Purple Onion Designs have an overstock sale on at the moment - their already great prices are reduced on a wide range of stamps, which you can see here.

I coloured Ruby with Copics, and used papers from Stampin' Up.
I used a foam pad behind each flag, with a line of glue along the top of the flags to attach them to  the twine.
Other Products used:


Saturday 9 August 2014

Crazy 4 Challenges Elizabeth Craft Designs Pop-up Waterlilies Card

The challenge I am hosting this week at Crazy 4 Challenges, is to go 3D (something which I'm sure you have guessed by now I'm rather fond of!)
I've used products by Karen Burniston and Elizabeth Craft Designs on this very pink card! (Links to the products are at the bottom of the post.)


Instructions:

1. Die cut a hot pink card stock card base with the Sizzix Pop 'n Cuts Square with Ornate Edges Card die. Run this card base through a die cutting machine again, this time with with the Pop it Ups Lucy Label die, to create the pop-up part.

2. Repeat step 1 with pink Shimmer Sheetz. Then run the Shimmer Sheetz layer back through the Sizzix Pop 'n Cuts card die, two more times, one time trimming 5mm from the top, and then again taking 5mm from the bottom. Cut 5mm from either side with a trimmer, and round off the corners with scissors. 
I actually cut my Shimmer Sheetz into 2 pieces along the fold line, so that the card folds better.

3. Snip out the label piece (so that it doesn't get embossed), and run the rest of the Shimmer Sheetz card layer through in the Damask embossing folder. Stick the Shimmer Sheetz layer to the pink card stock base. Stick on the Shimmer Sheetz label part.

4. Stamp the sentiment on a label cut from white card stock with the smaller label from the Lucy Label die set. 

5. Stick Elizabeth Craft Design waterlily peel-offs to water colour paper, colour with Tombow Dual Brush pens, and cut out (for more detail on this see below.)

6. Adhere waterlilies to the card, and adhere the white label with the stamped sentiment.

7. Cut some pink card stock measuring 11cm x 17cm and emboss it in the Flower Mosaic embossing folder. Adhere this to cover the back of the card.

8. Add the Lace Fan peel-off stickers to the top and bottom edges of this Flower Mosaic embossed card stock, on the outside of the card.

9. Add a white card stock tag to the outside of the card, and adhere a ribbon, and small peel-off flower, also coloured with Tombow pens.

You can see in the picture below, a little more clearly how I made the flowers. The Tombow Dual Brush pens are watercolour pens, so they don't stain the gold peel-off stickers in the same way that Copics do. (The black peel-offs are better for Copics.) I scribbled some pen colours onto a shiny surface, and used a Waterbrush pen to pick up the ink and paint it on. 
I coloured a petal at a time, and varied the amount of red, pink or purple which I used each time, to create slight colour variation between the different petals. 
Doing this kind of colouring is so much fun - I did most of the colouring on my lap, whilst watching 'Frozen Planet' with my 8 year old boy and chatting about it... pure enjoyment!!

You can see the colour variation better here.

The outside of the card.


Some of the products used:


Tuesday 5 August 2014

Elizabeth Craft Designs Fancy Label Accordion Birthday Card

Hello! Here's a tutorial for a card which I have on the Elizabeth Craft Designs Blog today:
DSC_0099Directions:
1. Use the Accordion Fancy Label die set to cut out light pink and dark pink cardstock panels, and three Shimmer Sheetz labels, as shown below. (One large dark pink label, one large light pink one, and one small light pink one.)
2. Use the Fancy Season Frame Edges die set to cut out four blue spotty cardstock edge pieces.
3. Use the Fancy Frame Edges die set to cut four dark pink plain cardstock edges, and four light pink Shimmer Sheetz scalloped edge pieces, as shown below.
4. Use the Flower Set 2 die set to cut out two flower layers and and one flower center.
5. Hand cut five small triangles for bunting/banner flags, and die cut a blue cardstock
“Happy Birthday”.
6. Stick a Funky Cakes Peel-Off sticker onto watercolour paper, and colour it in with some watercolour pens (such as Tim Holtz Distress Markers or Tombow Brush Pens) and a waterbrush pen, as shown by Els in this tutorial. Cut out the finished cake.
DSC_00837. Using a tape runner and glue pen, adhere all the card elements together, leaving the flower, cake, flags and the sticking of the two panels together till last.
8. Use small self-adhesive foam pads to stick on the flower parts and cake.
9. Use a small hole punch to make two holes in the side and bottom edges of the left-hand panel. Thread some twine through the holes, and secure it at the back with some sticky tape. Use wet glue to stick the individual flags to the twine.
10. Cut four more solid Fancy Frame Edge pieces of your choice (not shown in the picture) to adhere to the front of the accordion card when it is in closed position, to hide the ends of the twine and the tape securing it.
DSC_0101And you have finished!
DSC_0088
Some of the products used:


Saturday 2 August 2014

Crazy 4 Challenges Bunting (Banners) Pop It Ups Pivot Card

I'm hosting the challenges this month on the Crazy 4 Challenges blog, and thought I'd start off with challenging people to use one of my all-time favourite decorative card elements - bunting! (or banners!)

I really enjoyed making this card - love the bright colours and prints! I used the Katie Label Pivot die set by Karen Burniston for Elizabeth Craft Designs (which includes the nesting label dies too), and the papers are all from My Mind's Eye's Kate & Co 'Cambridge Court' 6x6 pad.
  
The panel with the sunglasses flips round and can been seen from the front of the card too. (I love the glasses die! A new one from Sizzix.) The little stars are made with a Stampin' Up punch. I stuck on the glasses, white label and stars with adhesive foam pads.

I used my Crop-a-dile to cut holes through the sides of the card, and near the centre point of the labels, then threaded through some twine. (The ends of this are hidden by the patterned paper on the outside of the card.) I added some hand cut bunting, stuck on with ATG glue tape runner. 
I used a sentiment stamp from Stampin' Up's 'Work of Art' set, which I cut down to this shortened phrase.
Some of the products used: