Monday, 7 October 2013

Extra Stamp Set Releases from The Stamps of Life

Yay! More new releases from The Stamps of Life today!
There are four great new stamps sets available, one of which is 'formal4words'. I really do love the beautiful swirly font of this one... 
As always, there are loads of great ideas for this stamp set in the gallery, here.

I created this chalk board effect card, by stamping with VersaMark ink, and using white embossing powder, teamed with hand cut bunting threaded onto twine, and some butterflies cut using Karen Burniston's Movers and Shapers die.

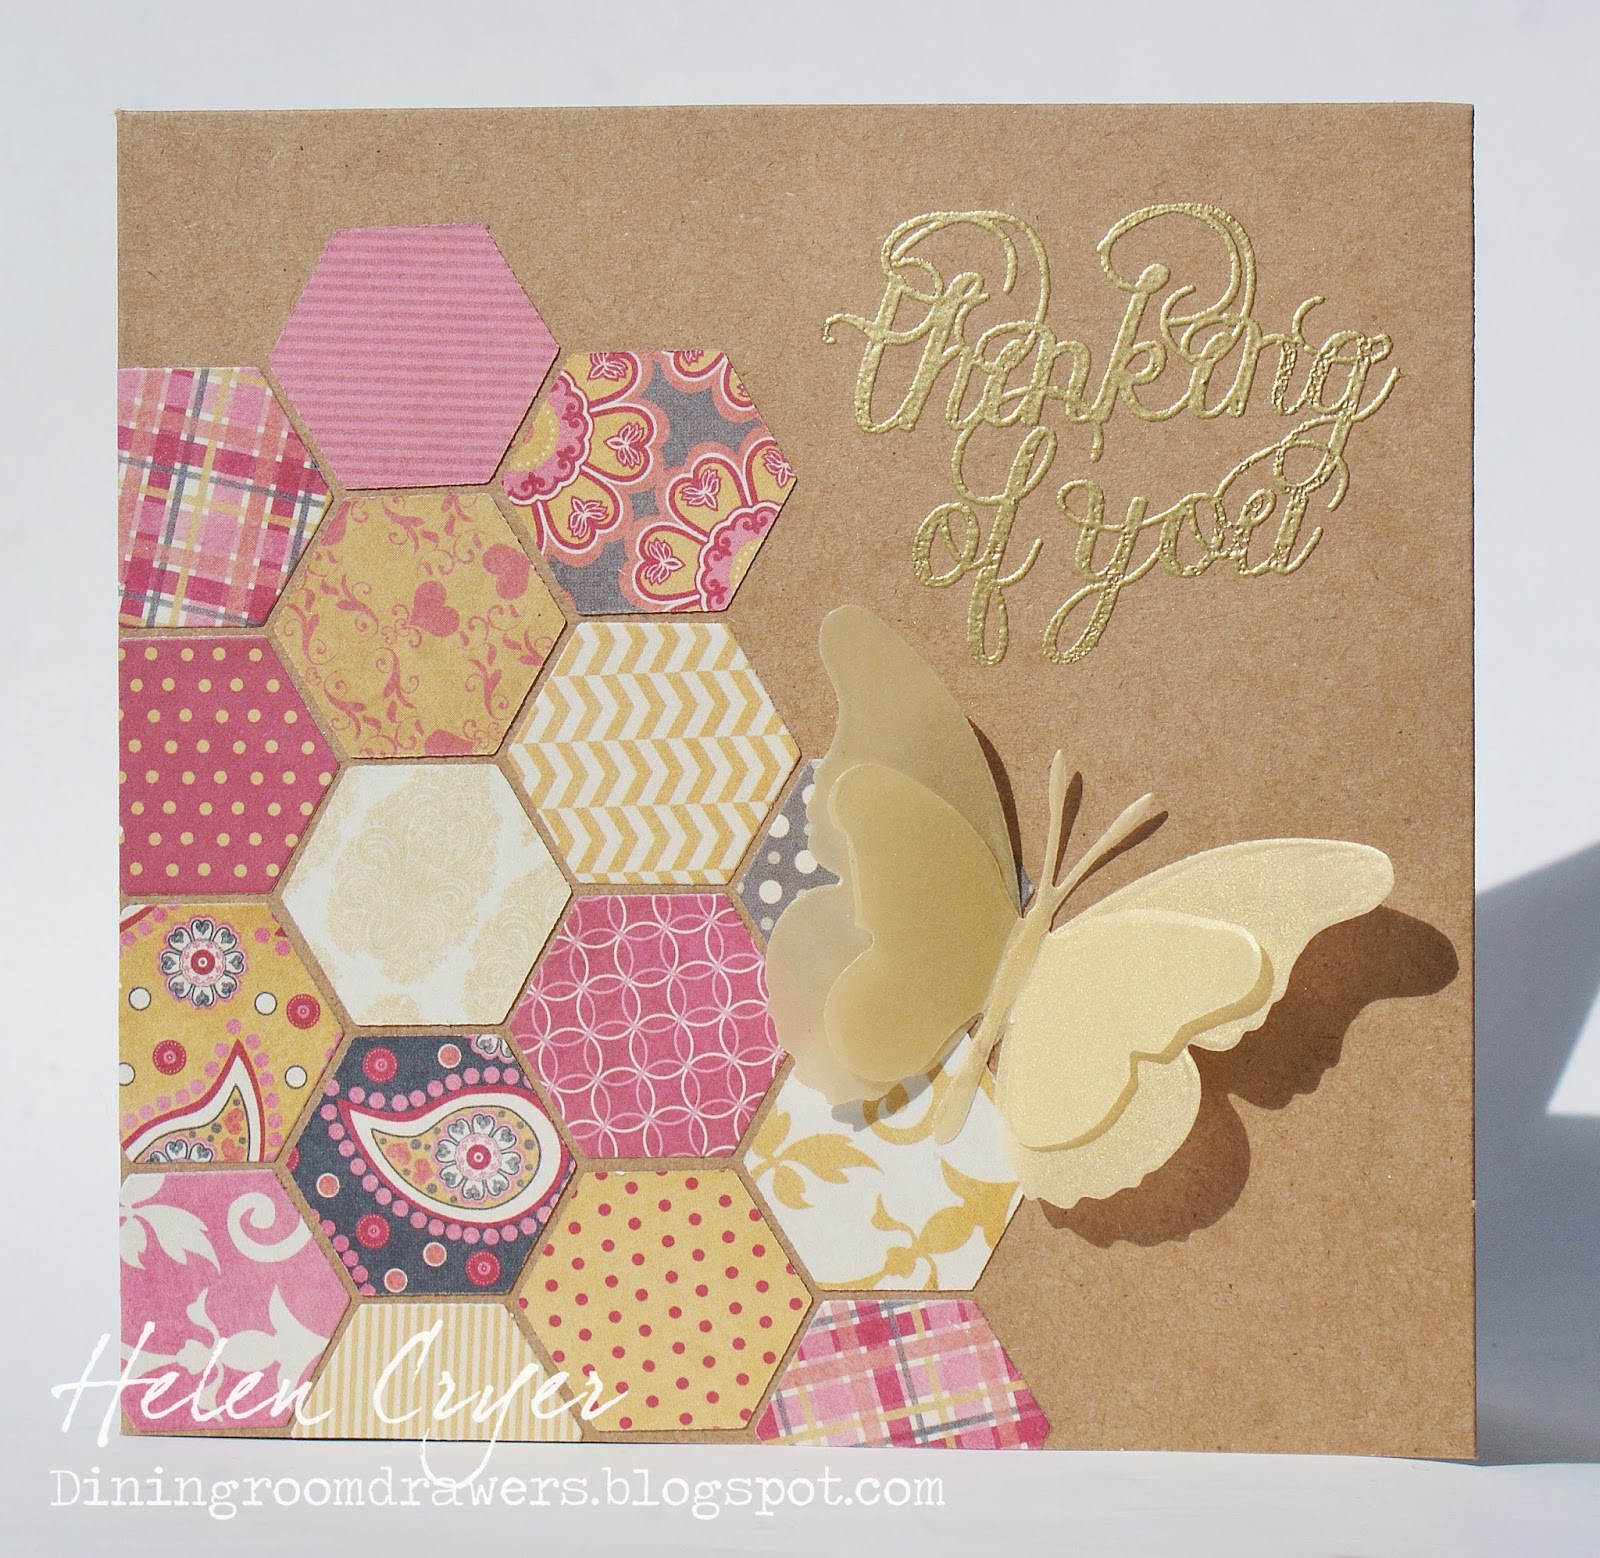
For this card I used The Stamps of Life Hexagon dies set, to cut out some larger hexagons, then die cut a circle window, and used a formal4words stamp inside the card. I stamped the sentiment in pink ink, and added clear embossing powder, then while the embossing powder was still sticky I added some pink glitter. (I think I need to work on this technique a bit - I managed to blow glitter far and wide with my heat gun, and everything in the house sparkled for days, including me...)
I then added some Tim Holtz Tattered Flower Garland die cuts, and some hand cut leaves.

Here, I used another sentiment stamp from formal4words, with some smaller hexagons from The Stamps of Life Hexagon die set. The butterflies were cut from gold vellum with Memory Box, and Tim Holtz Movers and Shapers dies.

Another of the new stamp sets being released today is called 'train2stamp'. The set comes with loads of stamps and sentiments, enabling you to customise any train scene you like. I especially like the track stamp!

For this card, I stamped onto patterned paper, and again onto cream card stock, then hand cut all the elements out, and layered them up. I stuck down the completed train and carriages with foam pads.

The set also comes with a little open carriage stamp, great for adding anything you fancy! The smaller wheels are the perfect size for brads.

And finally a clean and simple card, again with the train stamped onto patterned and plain papers, and layered up. This time though I used Copics to colour the wheels.
See more ideas for train2stamp here.

Thursday, 3 October 2013

Karen Burniston's Snippets Collection!!! (And Pop 'n Cuts House Card)

Yesterday some very HAPPY POST arrived!! Karen Burniston's entire new Snippets Collection!!
Ever since I first saw pictures of the new Pop 'n Cuts 3-D House insert, I've been itching to play with it, and this evening I finally had the chance to make a card! I used the A2 Pop 'n Cuts Base, with the new 3-D House insert, and used pieces cut with the accompanying Thinlits House set... they are SO cute, and really easy to use.
 So much loveliness! Thank you Karen!!
I didn't actually use the house piece from the Thinlits set, but cut a couple of extra layers using the House insert die. I also made a narrow side window, by cutting down a window and window sill pieces.
I wanted to make a kind of gingerbread style house, with white icing (using Liquid Pearls). Unfortunately, I dropped the house while it was still wet, so my 'icing' spots got a bit blurred!
The paper is from First Edition's 'Nordic Christmas', and for the red border I used a Thinlit die from Karen's new 'Banners and Borders' set. I really love this swirly one!
I also used two dies from the 'Sassy Labels & Stitched Frames' Framelits set, for the sentiment. One of them just adds the stitches - a fab look!
Can't wait to play more with the Snippets Collection very soon!

(Update: If you would like to see another gingerbread house card of mine, using more current products, it is here.)

Some of products used:


Monday, 30 September 2013

The Stamps of Life October Club Set Release

The first of the month means it's time for the latest Club stamp set release over at The Stamps of Life - and also a matching die set, if you are a 'Die Hard' member! This month the set is called tickets2stamp, and I really enjoyed working with it.
Here are some cards I made using the stamps and co-ordinating dies.

The die set comes with a single ticket die, but also a brilliant strip of tickets die, which I used in this card, but then folded the two outside tickets back on themselves, and snipped out ribbon ends.
The stamp set comes with tonnes of sentiment options for adding to your tickets, and I really like this Happy Birthday font.

I like all the different elements of the ticket stamp. They are great for cutting out and really layering up.
Another combination of the different sentiment stamps, with clear embossing...

This card shows better the row of tickets die, and also how well it goes with the row of tickets stamp. The smaller words, and little white label die cuts are included in the stamp and die sets too.

And finally, I think the ticket also looks good stamped, with white embossing powder added, onto darker coloured cardstock. Here I cut a window in the Square Flip-its card, with a square Movers and Shapers die, then added an acetate layer to the back, so I could 'suspend' the ticket.
I concealed the edges of the acetate behind the red cardstock frame on the back, and added another ticket die cut to the back, in exactly the same spot.
I also found this great K&Co Cut'n'Paste paper with tickets on it!
There are plenty more ideas to be found in the gallery, too!

Sunday, 29 September 2013

Pop 'n Cuts Label Window Deer Christmas Card

I ordered a lovely Christmas paper pad by First Edition, called 'Nordic Christmas', which arrived yesterday, so last night made this Christmas card. I've got a horrible cold at the moment and feel rubbish, so making this distracted me a bit from it... though I crafted a lot more slowly than usual! (I was also registrar at a wedding yesterday, and made good and sure I triple checked everything, to make sure the couple were well and truly legally married... having a cold would be no excuse!!)
I used Karen Burniston's Square card with Ornate Edges Pop 'n Cuts base, with the Label Window insert, and used the Bigz Edge and Scroll die to create the panel that fits behind the opening.
For the larger pop-out label, I cut a label layer using the Bigz Butterflies and Labels die, and put that piece in the Sizzix Base Tray to cut out the word 'Wish' from it, using Tim Holtz's Movers and Shapers die.
For the smaller label, I hand cut a couple of hearts, layered with foam pads.
 I cut two deer with the Sizzix Bigz Deer die, and glued them back to back either side of the card front, and gave the deer Enamel Dots noses.
 All the pieces had their edges sponged with Distress Ink.
To the front of the card I also added a piece cut with the Sizzix Originals Flourish die, and some flowers which I made in a silicone mould using ThermMorph. (See my post here on it.)
I then just added a couple of labels cut from papers in the same pad, and added some Liquid Pearls and a bow.

Some of products used:


Thursday, 26 September 2013

ThermoMorph Product Review

I was recently asked to try out and review a new product called ThermoMorph. 
It arrived really promptly in the post, and I have spent this afternoon playing with it.
 I made the butterfly and rose on this card with it... read on to see what I think of ThermoMorph, and some of its possible applications in crafting.
ThermoMorph's polymorph granules comes in a 500g tub, which you put into boiling water. The instructions call for you to let the water cool to 60 degrees, to avoid scalding. (After a few uses, I felt happy to put the pellets into freshly boiled water though - no need for the thermometer.)
 After a minute or two, the pellets turn clear, and stick together, at which point I fished them easily out the bowl with a spoon. I didn't find that the Thermomorph stuck to anything else - I could pick it up easily, and begin kneading it into a smooth modelling material. 
 I'd compare the consistency of it to soft, smooth bubble gum!
I read in one of the Amazon reviews that Thermomorph can be coloured with food colouring. I had a go with using a food colouring paste (against my better judgement - it is plastic after all!) and the colour didn't take at all, I just made a huge mess of my hands. I then had the idea to try using the colour powders that are used for colouring fondant icing. (Mine are called 'Edible Tints' and 'Edible Lustre'.) I tried using a shimmery white glittery lustre first, which had this subtle result:
 After kneading the lustre in, a minute or two later the Thermomorph started to get more solid as it cooled,  so I put it back in some boiled water. None of the lustre powder transferred into the water at all, and after another moment or two, it was soft enough to work with again.
 I pulled a smaller piece off (you can see the quite clean way it pulls off in the photo below), and pushed it into a silicone flower mould. After only a minute or two, the flower could be pulled out, and I was really pleased with the results - virtually no air bubbles, and a good clear impression of all the details in the mould - plus it set extremely hard really quickly, and the flower would be ready to use straight away.
I then coloured some more ThermoMorph with a shimmery pink, and matt blue. I really like how the blue turned out. The flower looks like one of the expensive resin flowers you can buy for card making and scrapbooking etc. From a tub this size you could make hundreds of flowers.
 Some of the shimmery pink, in a different mould.
 I then had a go with some more Thermomorph, and this time rolled it out. It didn't stick to my work surface, or the small acrylic rolling pin I used.
 You can get it really thin.
 I then had a go at rolling some out on an embossing folder surface. It took on the embossed pattern very easily, and then set hard.
 I tried cutting the rolled out, set ThermoMorph in my die cutter. It was slightly too tough to be cut with wafer thin metal dies, but worked fine with the Sizzix Bigz dies. Even with the pressure of the rollers in the die machine, the embossed shape did not flatten out - it really does turn into properly sturdy (slightly bendy when thin) plastic.
 The waste ThermoMorph can then be just thrown back into some boiled water, and re-shaped. I just threw this cooled blue blob back into the tub, ready for when I next want to use it.
 I also had a go at painting the hardened ThermoMorph. You can see from the flowers at the bottom of the photo below that the paint (I used Tim Holtz Distress Paint) doesn't stick evenly, but pools a little in the cracks. The cream and black plaques had two coats of paint. I didn't especially like this look, and the paint took ages to dry, as it was on a non-porous surface. To colour ThermoMorph, I would definitely recommend using powder colour. You only need to use a little bit of powder. You might have better luck using a spray paint designed for plastic though.
 Below: Black plaque was painted with 2 coats of Distress Paint. White plaque and top row of flowers are plain ThermoMorph with nothing added, the two rows of  pink flowers have varying amounts of 'Edible Lustre' powder in them. I'm sure there are other powder colour products on the market - I was just using what I had on hand from my cake decorating stash!
My verdict:
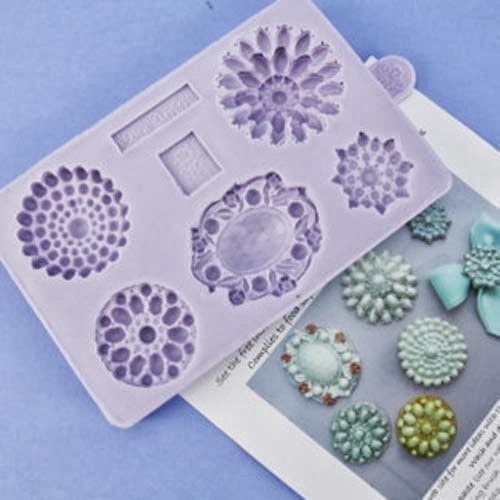
I'm really excited to use ThermoMorph in more moulds, to make 'resin' looking embellishments for my cards. There are tonnes of great, relatively inexpensive silicone moulds on ebay. I would suggest only using ones where the shape is mainly in one mass (such as these below - pictures taken from eBay.co.uk) - no thin or fidly bits, remember - think 'bubblegum' consistency. 
 I will also be very likely to get some more powder colours. I'll stick with edible ones, so they can double-up for when I am working with icing.
I think I might well roll, emboss and die cut more shapes too, for some added dimension and texture to my cards.
I know I haven't explored lots of the other possibilities of ThermoMorph - the other Amazon reviews talk about using it to fix items, mould objects from scratch etc, but none spring to mind at present for me.
I let my kids play with some after school, but by the time it was cool enough for them to handle, it was becoming less pliable, and they didn't manage to make anything worthwhile. I think this is the one drawback of ThermoMorph - that you only have quite a limited time available to work with it. Yes you can throw it back in hot water to make it pliable again, but then you pretty much need to start again.
All in all, I like it - I can easily see myself using it to make shapes for cards and 3D projects. It melts and sets quickly enough for this to not be very time consuming or off-putting, and it's clean and fun to work with.

Sizzix Flying Easel New Baby Twins Card

This card is for my brother's family. Two weeks ago, my sister-in-law gave birth to twin girls at 27 weeks. The babies are so, so tiny - they weighed 1lb 13oz, and 2lb 7oz. It's a scary time, but they are making progress. The girls have been named Harriet and Vivienne, and they are incredible!
I made this flying easel card, which you can find instructions for by Karen Burniston, here.
I used the Pop 'n Cuts Square card with Ornate Edge, for the card base, and used dies from Karen's Wavy Label Framelits set, for the opening and the frame round it.
 I trapped some twine between the two frame parts (I added an extra layer on top), and then added separate bows at each side, and folded little bunting flags over the twine, with a bit of ATG glue to keep them in place. The letters and heart were from a couple of old chipboard sets.
The paper is 'Floral Pavilion' by First Edition.
I used Karen Burniston's Fancy Frame Bigz die for the outer frame shape on the floor of the card, and used a circle punch on glitter card, and then a Melissa Fances sticker for the centre. I think the sentiment is just perfect! 
These bits were all stuck down with foam pads, and they stop the top part of the card slipping forwards.
I then added a couple of strips of card to decorate the edge.

 The card's not really designed to stand up like this below, but it looks quite pretty, seeing the frame half of the card folded out flat, with the sentiment peeping through...
 For the back of the card (actually the bottom), I added a couple more die cuts from the Wavy Label Framelits set, and added my message there.

 Some of products used:


Monday, 23 September 2013

Settlers of Catan Sizzix Pop 'n Cuts Card!

This card is a bit of a joke with Karen Burniston, who is a fellow 'Settlers of Catan' player! (which I happen to think is one of the best designed board games of all time!)
I wondered a while back if I could come up with a card based on the game, and this is my attempt this evening!
I used Karen's Funky Label insert in the Square Pop 'n Cuts Card base with Ornate Edge. The Funky Label part was cut down a little bit to fit behind the game board.
For the game board, I used the smallest hexagon dies from this 'The Stamps of Life' set, and my youngest son helped me get the right number of each of the resources represented by each hexagon (wheat, sheep, wood, ore and brick). There is a desert hexagon, which has the 'robber' piece on it, and then the playing pieces for two players, who have built little settlements, roads and a city.
I glued the pieces to some blue (sea) backing card, which I cut out by hand, and then painted the sandy bits round each hexagon.
On the back of the card, I made two 'resource' playing cards, and painted a cream patch on each, and added some little hand drawn and cut logs and rocks, stuck on with foam pads.
 I stamped a sentiment, and used the Cricut 'Base Camp' cartridge for the 'CATAN', then added a couple of hand cut dice.
My husband walked past while I was stamping the sentiment, and said he hadn't been aware there was a need for this kind of card, before!
I made simple yellow borders, using the egde of the card base die. The dark red and yellow colour scheme echoes the packaging colours of the game.
I just made a simple outside of the card, with the scroll which is on the card base die, and scallops from Eileen Hull's 'Borders and Hydrangeas' Bigz die.

Some of products used: