Friday, 20 February 2015

Cat in a Box Pop it Ups Card

I had fun making this one! I just got a new Neat and Tangled box die in the post, and thought it would look cute teamed with one of Karen Burniston's character dies - Whiskers the Cat.
I also thought it would look good as a pop-up card too, so used Karen's Lucy Label Pop Up card die, to create the panel to stick the box to.

I added a party hat to the cat, from the Props 2 set, a little tag and stamp, both from a Sizzix tags and stamps set, the paw print dies from the Props 4 set, and the frame from the Rectangle Pull Card die set.
The paper are mainly from First Edition's Bella Rose pads.

I added ribbon strips (stuck on with ATG tape, with the ends tucked under the floral paper panels), and a Birthday die cut and stamps from Marianne Design, and rounded off the edges of the card with a Zutter Round-it-all.


Some of the products used:


Tuesday, 17 February 2015

Star Accordion and Purple Onion Designs Birthday Card

Another birthday card for one of my nieces today... it's the Half-Term holidays this week, and we are having a nice quiet time at home, and I've been able to get a few cards made.

This one uses Karen Burniston's new Accordion Star die set, which cut the panels, the inner star layers, the 3-D barn star, and the small stars.

I used Purple Onion Design's 'Jackson & Bubbles' stamps, which I coloured with Copics. I stamped the bubbles with Staz-On ink onto acetate sheeting.

Before folding the barn star, I used a stamp from this set with Versamark ink, and gold heat embossed it.
I used papers from Crate Paper's Maggie Holmes and Flea Market 12 x12 pads.

Some of the products used:


Sunburst Black and Gold Birthday Card & some new Stash

 I thought my husband might like a little help choosing a Valentines gift for me this year, so I picked out some new craft products! How nice of me!

I made this card for my brother with some of them - I used the Sunburst stamp from Neat and Tangled to stamp with Versamark ink, and then gold heat emboss the background. I added a glitter card 'birthday' cut with a Mama Elephant die, and the 'Happy' with a 'Label Love' stamp from Altenew.
That's it really - just trimmed some narrow strips of gold glitter card and glued it to the borders, and added a few sequins and gold glitter candy dots.

What a lovely present!!


My lovely husband also treated me to flowers and chocolates... he obviously wasn't too impressed by stamps!!

Sunday, 15 February 2015

Pop It Ups Butterfly Pivot Card (Elizabeth Craft Designs) & Paris Edges

Here's a card which was made for Karen Burniston's Elizabeth Craft Designs stand at the recent CHA show. I used Karen's Butterfly Pivot Card die set, to cut the moving butterflies, and large butterfly decorative layers.
I also used Karen's new Paris Edges set for the lovely doily-like floral edges.

I used the Butterfly Accessory Dies set to create the almost embossed look of the butterfly background. It's easiest to stick wide Elizabeth Craft Design double-sided tape to the card stock before die cutting the little delicate butterflies, so they are made into stickers, rather than doing lots of fiddly glueing.

And the front of the card with some ribbon, paper flowers and metal butterflies added.
All the papers are from First Edition's Bella Rose collection.

Some of the products used:


Friday, 13 February 2015

Valentines Cards (With Sizzix Flip-its, Tim Holtz & Papertrey Ink)

I just wanted to show you the Valentines cards I've made for my family this year. I loved making them!! Playing with paper, with a big fat smile on my face!

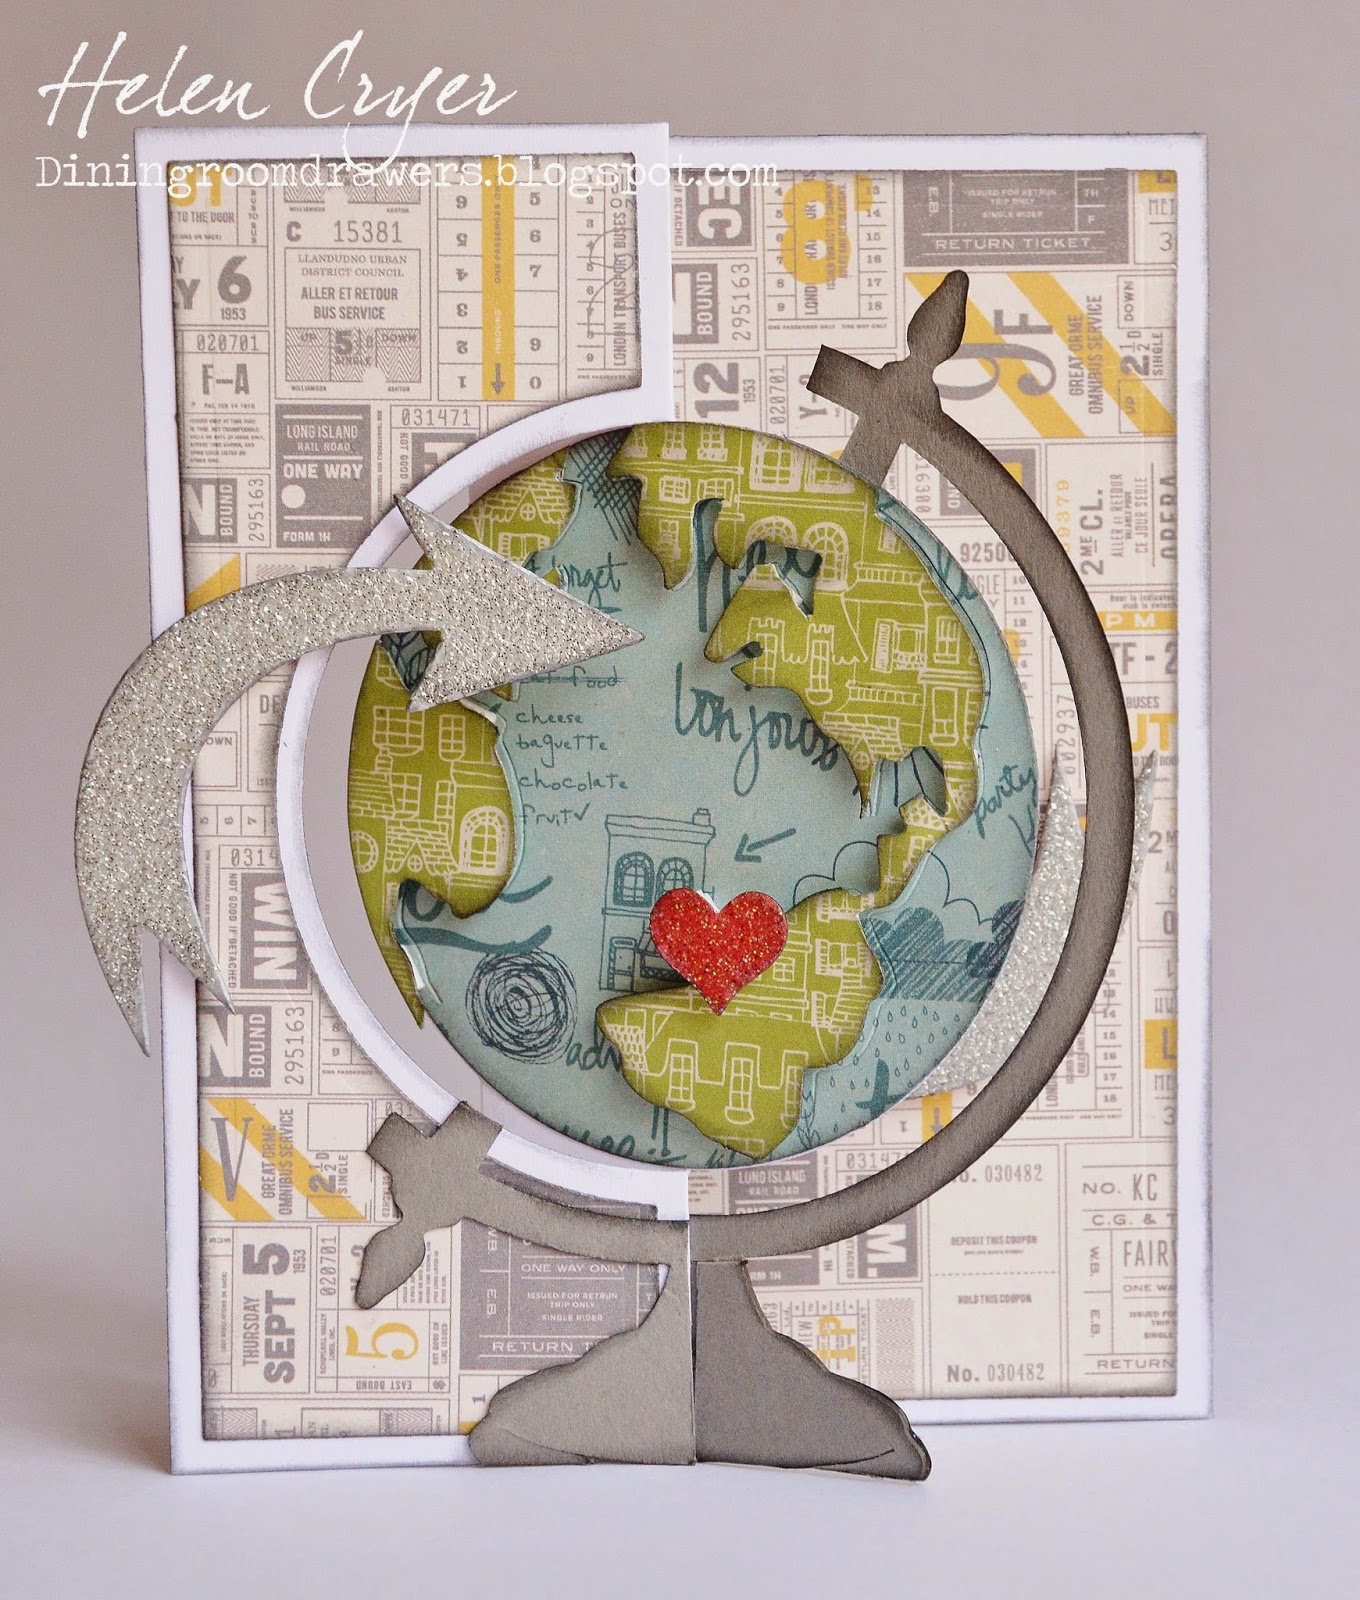
For my husband's card, I used the Sizzix Flip-its Circle #4 die, the centre circle of which happens to fit absolutely perfectly with Tim Holtz's Sizzix Vintage Globe die.
I stuck a grey cardstock globe to the back of the circle, and then die cut it again in grey, and snipped a portion of the globe stand out, and stuck it to the card front.

I then glued on a blue globe layer, and the countries I snipped out of a green die cut, and stuck on with little foam pads, after inking all the edges.

The papers are all from Basic Grey's Mon Ami 6x6 pad.

I also stuck a silver glitter card die cut arrow (from Tim Holtz's Sizzix Artful Arrows die) to the left-hand card panel.


Inside the card, I stuck another arrow, and words cut with Elizabeth Craft Design's Alphabet 1 -Caps. I stuck ECD's wide tape to the back of some card, to turn the letter die cuts into stickers.
The heart is a die from Lil' Inkers.

On the back of the card, I had an ink splodge, so covered it with a strip of grey card. I added another heart (and arrow) from Lil' Inkers, and more letters from ECD.

For my kids' cards, I used a Stampin' Up embossing folder on some card blanks, cut little frames with the 'Framed Out' die from Papertrey Ink, and added their initial in the first frame, a heart from Lil' Inker in the second, and a stamp from the matching 'Framed Out' stamp set.


Some of the products used:


Thursday, 12 February 2015

Sizzix Triple Circle Flip-Its Cards

I thought I would show you some cards today made with Sizzix's Triple Circle Flip-its die set, by Stephanie Barnard. I love all the Flip-its dies, especially with their wonderfully handy layer dies that they come with them, and this Triple Circle Flip-its is a lot of fun to decorate.

This card was really easy to make into traffic lights, along with the Sizzix Framelits Dies & Stamp -Cars set.

I decorated this card with stamps and dies from The Stamps of Life.

This card was decorated with a Sizzix tag, and Sizzix stamp.

And finally, I decorated this card with snowman elements from these stamps and die sets from The Stamps of Life, and the tag and sentiment stamps from this set.


Some of the products used:


Tuesday, 10 February 2015

Karen Burniston's 'Artsy' Designer Challenge Tim Holtz Style Eiffel Tower Pop it Ups Card

 This month's Designer Challenge from Karen Burniston, is to make either an 'Artsy' or 'Cutesy' card, and so my card today is my attempt at 'Artsy'. I wouldn't say that's my usual style, but I've had fun making a mess with ink and paint!
I used the Lorna Label PopUp Card die for the pop-up mechanism (and stitched label). 

Firstly though, I made my own patterned paper by using a Purple Onion damask background stamp, and stamping it with VersaMark ink, and adding clear embossing powder and heating it. I then sponged some brown, light blue and teal ink over the pattern. Next I sprayed the inks with water mixed with a little mica powder. This added some shimmer, and also made the inks spread into each other. Once dry, I placed some copy paper over my patterned paper, and ironed it. This takes off the clear embossing powder, leaving a flat patterned paper behind which can be inked.

This my finished shimmery paper, ready to use as my background paper.

I added the Eiffel Tower from the Eiffel Tower Pop Stand set, and painted it with Distress paints, then dipped it in UTEE thick clear embossing powder.
I added various stamps, and a Tim Holtz stamp for the sentiment. I added Crackle Accents to a couple of separate word panels (I was impatient, and it's not quite dried in these pictures!)

I also die cut, Distress Painted and clear embossed a couple of cogs from the Clock and Gears set.

I used Distress Stain to colour some seam binding, and a paper flower too, and rounded off the card edges with my Zutter heavy-duty Round-it-all.

Some of the products used:


Monday, 9 February 2015

Hydrangea Card

I wanted to have a go at making a simpler hydrangea card, using the new Hydrangea die set by Susan Tierney Cockburn for Elizabeth Craft Designs. I really enjoyed assembling it! The stem die has a circular shape built in to the top of it, which you can shape outwards with a ball tool, making an ideal surface for sticking your teeny flowers to.

I just simply bordered the three hydrangeas with glitter card.

I also made a custom fit envelope for the card with my Envelope Punch Board (love using that thing!!) and decorated it with a die from Karen Burniston's Happy Birthday PopUp die set, and Stampin' Up stamp.

Did I mention I love hydrangeas!! They remind me of my Grandma's front garden, which was full of them when I was growing up, and also remind me of France. There is a wood near our house in France, which every summer is filled with blue hydrangeas... beautiful!! These are my pictures from last summer.


Some of the products used:


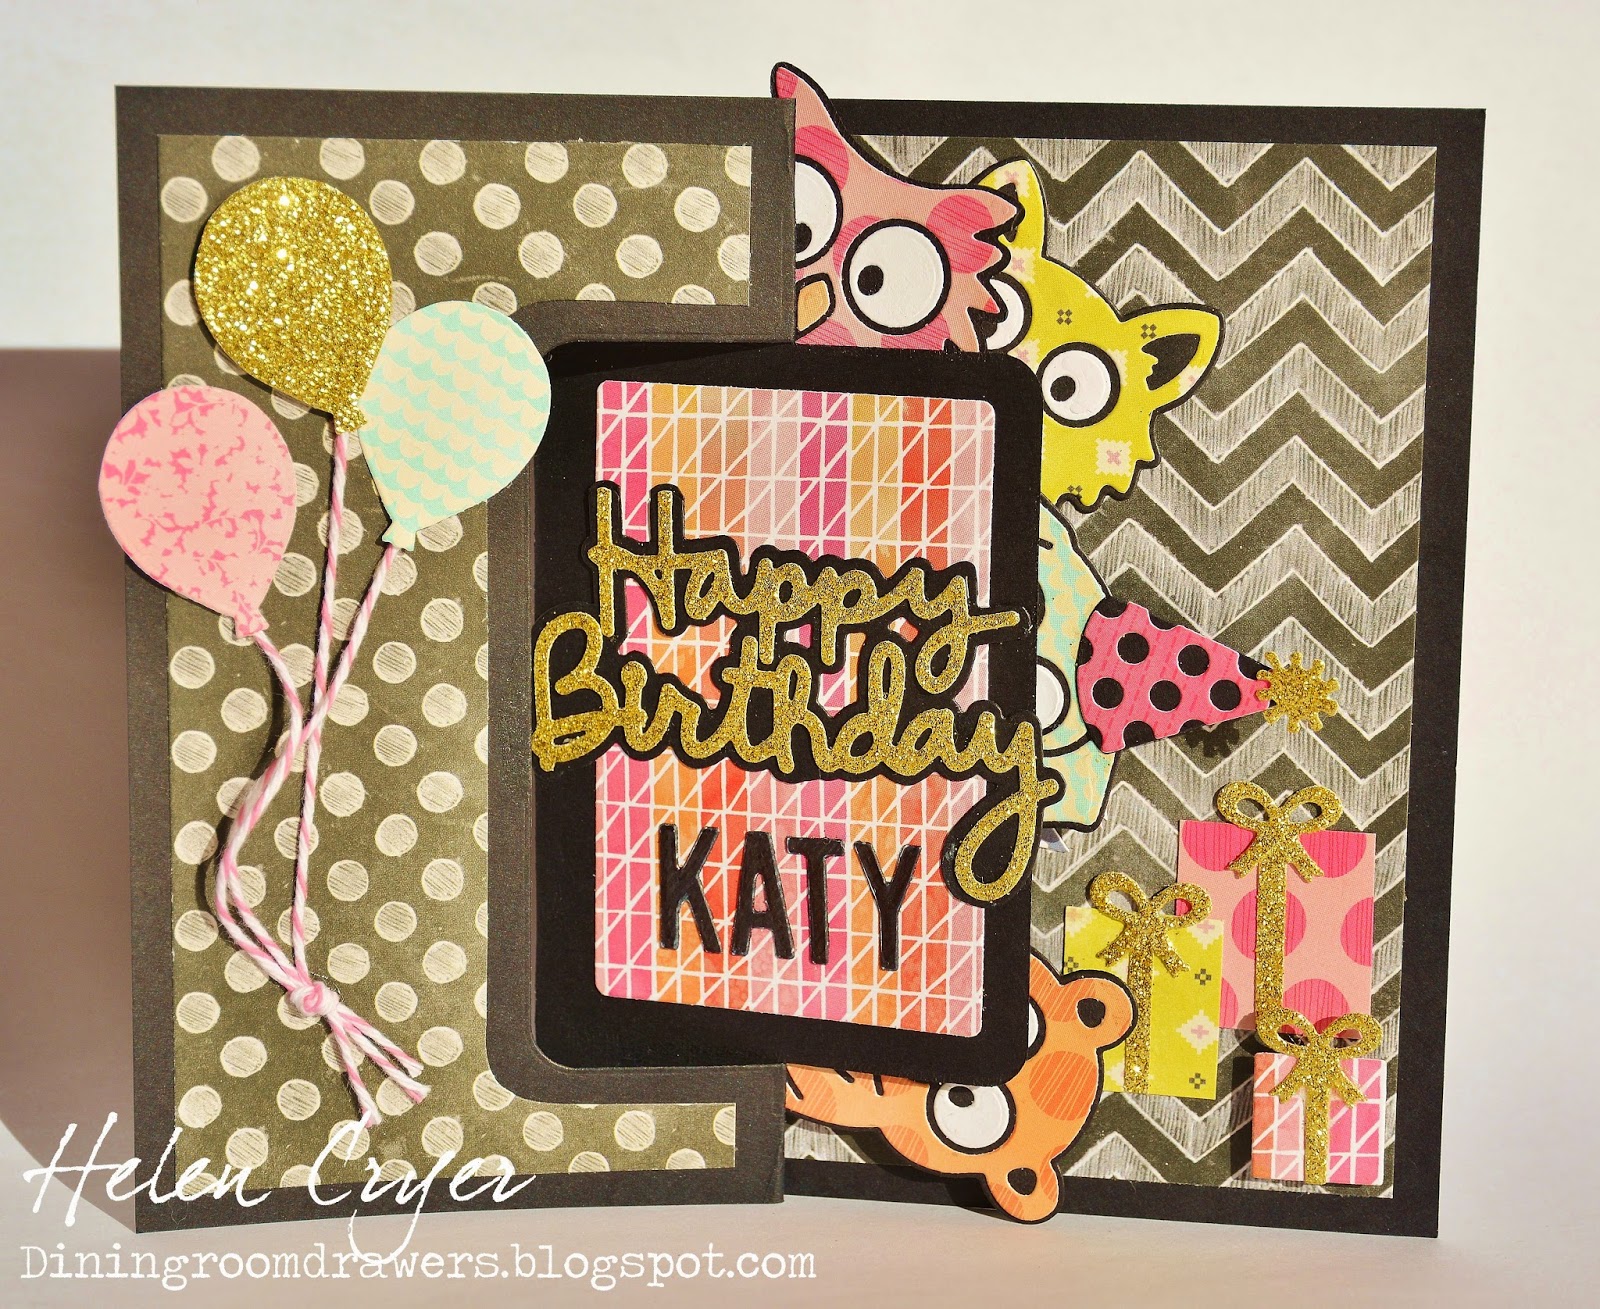
Karen Burniston's February Designer Challenge Cutesy Character Pull Card

Karen's challenge this month is to create either a 'Cutesy' or 'Artsy' card. 
I've had the idea in the back of my mind to make a Pull Card with a few of the characters peeping out, so decided to try and make a full-blown character party card!
 I used the Rectangle Pull Card die, with a bunch of balloons on the front flap. (I used the balloon from the Props 2 set, with the ears trimmed off.)

I used the Happy Birthday from the Happy Birthday PopUp card, for the front, with letters from the Alphabet 1 - Caps set.

Inside, I added four of the Pop it Ups characters, and a string of bunting, plus some gifts (with bows from the Evergreen Pivot Card set.) The party hat and party blower are also from the Props 2 set.
Most of the papers are from basic Grey's Fresh Cuts Collection 6x6 pad, and We R Memory Keepers Chalkboard 6x6 pad.

 I used two of the spinner pieces (that comes in the Rectangle Pull Card set), behind Buster the Dog and Honey the Bear, so that they would move from the 'peeking out' positions, to an upright position when the card opens.
I also decorated Poppy the Owl on both sides, so you can see her from both angles.

Some of the products used:


Saturday, 7 February 2015

'Sayings 4 Cats' Stamp Set from The Stamps of Life

I said a week or so ago how much I enjoyed the cat2stamp set, from The Stamps of Life, and today a new co-ordinating set has been released, called sayings4cats.

I had a lot of fun making this card! I stamped a cat onto Stamping Mask Paper, and cut it out by hand, to create a mask, which I stuck to my card in order to cover up areas I didn't want ink to get onto. This is how I achieved the overlapping of the cats.
I then coloured the cats with Copic pens, and added black Enamel Accents to the cats' eyes and noses, to create a lovely 3D glossy effect.

For this card, I used the dies that match the cats2stamp set, the Talk Bubble Dies set, and Basic Step-Ups card die set.

Ad lastly a card using the Triple Circle Flip-its die set.

Some of the products used:


Friday, 6 February 2015

Hydrangea Oval Accordion Card

I just got a couple of Susan Tierney Cockburn's beautiful new flower dies for Elizabeth Craft Designs in the mail this morning, and made this card using the Hydrangea die, and Karen Burniston's Oval Accordion Album.

 The hydrangea set is pretty easy to use - I used the little flowers die twice (the dies cut 18 flowers at a time!), and cut two lots of leaves as well, then layered them onto the stem part. I used a ball tool in a foam pad to shape the leaves and flowers, and added ink to the edges. I love it!

I added edges to the page with the Oval Flourish Frame Edges die set. I added wide double-sided tape by Elizabeth Craft Designs to the back of my patterned paper, before die cutting, to make it really easy to stick the frames down.

Products used:


Sunday, 1 February 2015

Cat2stamp February Club Set Cards - The Stamps of Life

I LOVED working with this month's new stamp and die sets from The Stamps of Life (and it must have been a real hit, because even my 9 year old son was asking to make cards with them!)

The set is called cat2stamp, and here I used it with the Circle Flip-its #4 die set.

For this card I trimmed the patterned paper cat around the stamped line, and used the cat die as a shadow layer. I created the background pattern with other stamps from the set.

For this card using the Elegant Flip-its die set, I cut the paw die into the flip part of the card, and also used the paw print border die on the patterned paper layers.

And finally a Copic-coloured cat, which has an extra hand-cut head layer and sparkly collar.

Some of the products used: