Monday 30 June 2014

Elizabeth Craft Designs Repositionable Sticker Project

For our monthly Elizabeth Craft Design's Design Team challenge, we were given the fun job of creating a repositionable sticker!
I chose to make a sticker which you can send as the front piece of a card, but which then peels off for use in decorating any hard surfaced item, in this case a little kitchen jar.
Els from Elizabeth Craft Design has made a great tutorial (here) showing how to make a repositionable sticker from any peel-off sticker, using double-sided adhesive sheeting, and transfer sheets.

Here's my sticker, on a card ready to send.

You can see that I stuck down the backing paper from the Transfer Sheet (with tape runner) onto my card, for the sticker to sit on.
 This picture also shows how glittery the sticker is. You will see in the You Tube video how Els uses Microfine Glitter, coloured with Copics to decorate the sticker.

Some of the products used:


Evergreen Pivot Card - Karen Burniston & Elizabeth Craft Design new dies

 A Christmas card in June!!! Well when you have all of the new soon-to-be-released dies from Karen Burniston and Elizabeth Craft Designs, it's hard to resist! You'll love them!

For this card, I used Karen's new Evergreen Pivot Card die set, which creates the cut in the card, but also comes with loads of extra dies, including the three tree layers. I also used one of the dies from Karen's new Outdoor Edges die set, to cut the little evergreen trees. 
The snowflakes come from Karen's Spiral Circle Pull Card die set.
Elizabeth Craft Designs also have a tonne of wonderful new Christmas dies being released, and I used the Merry Christmas die, the large Holly Leaf die (on the card front), and some foliage, poinsettia and smaller holly leaves from the new Candle die set.

I used Pink Paislee's Buttered Rum paper, and added some white Candi Paper Dots, which I glued some clear sequins to.

 On the card front, I made a gold cardstock frame round the edges, to give some strength to the double-sided patterned paper I used for the card.


Some of the products used:


Sunday 29 June 2014

Katie Label Pivot Card for Elizabeth Craft Designs

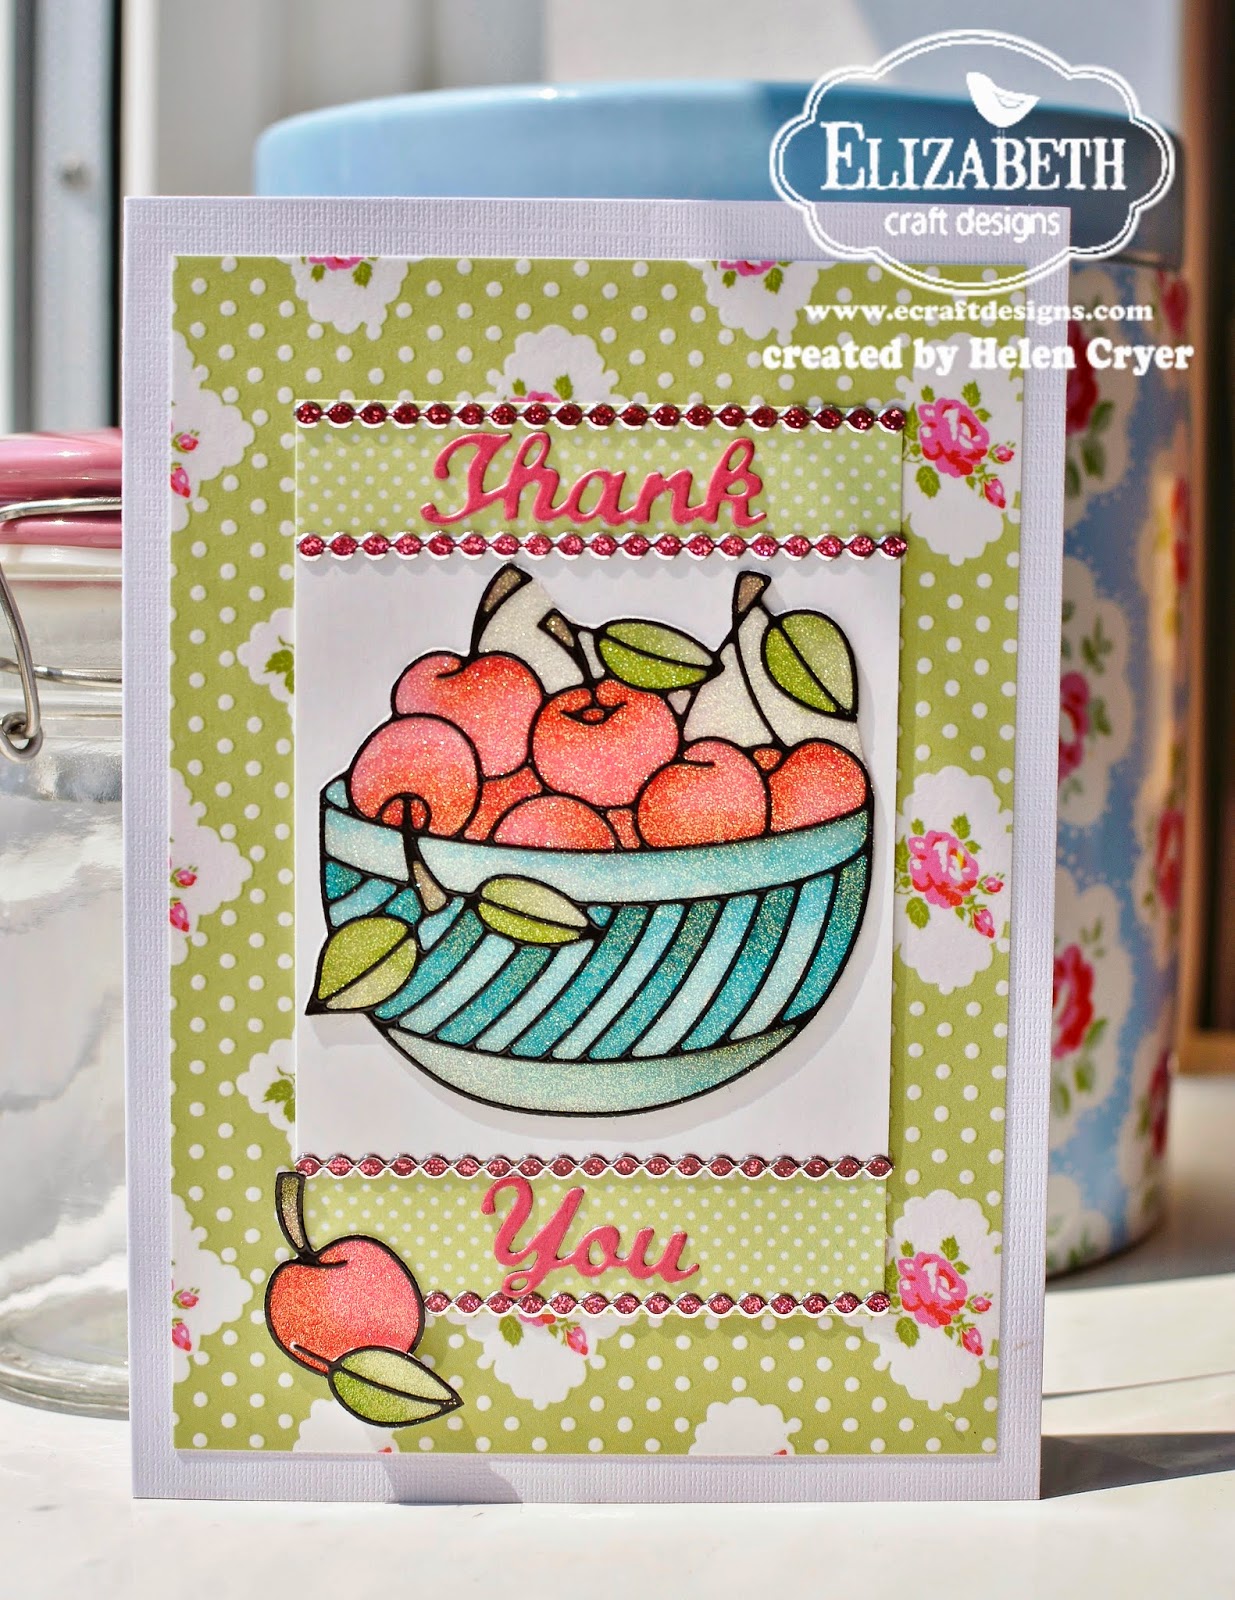
Just wanted to share a card tutorial with you which I did for the 
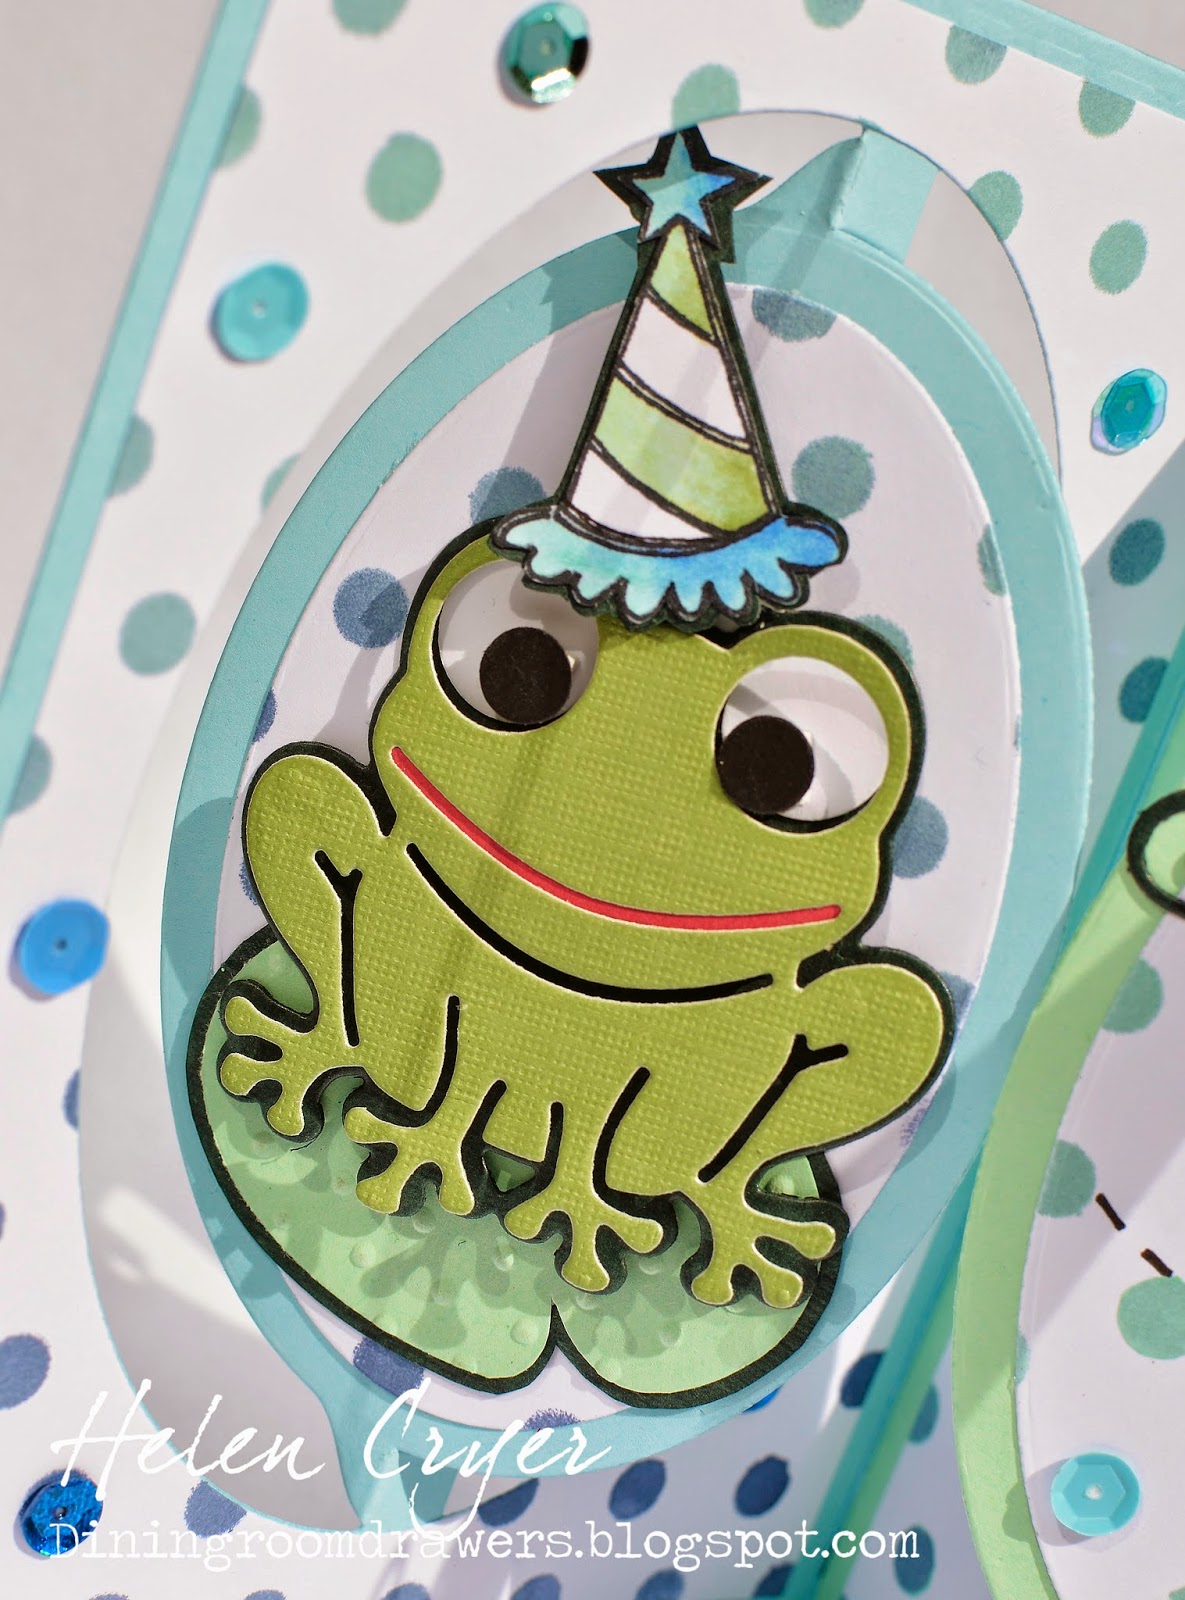
Elizabeth Craft Design's blog yesterday. For this card I used a couple of different peel-off stickers, along with the Katie Label Pivot Card die.
DSC0151 (2)
Directions:
1. Cut a piece of double-sided adhesive, large enough for 1 flower label and three single flowers from the ‘Flower Labels 1′ peel-off sheet, and for a dragonfly and ladybird from the ‘Bugs’ peel-off sheet. Stick one side of the double-sided adhesive onto white cardstock.
2. Stick all peel-offs to the other side of the double-sided adhesive.
3. Cover your adhesive and peel-offs with Cool Diamond Microfine Silk Glitter. Polish and brush of the excess glitter.
4. Color peel-offs with Copic or other alcohol markers. You can see Els demonstrating all of steps 1-4 HERE.
5. Cut around the finished peel-offs.
6. Use the Katie Label Pivot Card die to cut a pivoting label into a piece of peach coloured cardstock (measuring 21cm x 15cm). Also die cut one glittered card label using the largest accessory die included in the Katie Label Pivot Set. See picture below.
7. Use an edge die from the Agatha Edges die set, to cut out three borders (10.5cm wide) from Purple Iridescent Shimmer Sheetz. Use a trimmer to cut the straight edges. Die cut ‘Happy Birthday’ from purple cardstock.
8. From blue patterned paper, cut pieces measuring 21cm x 5cm, and 10.5cm x 5cm. Put a score line down the middle of the larger piece.
Helen Cryer (1201x743)
9. Adhere the largest piece to the inside of the card down the bottom. Adhere two Shimmer Sheetz borders as shown in the first picture. Adhere two glittered flower peel-offs as shown. Use adhesive foam pads for one to create dimension.
DSC0151 (3)
10. Adhere the smaller piece of blue patterned paper to the front of the card, along with the third Shimmer Sheetz border, and third glittered flower peel-off.
11. Cut a piece of green patterned paper measuring 9cm x 10cm, fold it in half, and use it to cover the gap at the back of the card left by the pivoting labels.
12. Add strips of Purple/Silver Glitter Border Peel-off Stickers along the top edges of the Purple Shimmer Sheets border pieces.
13. Die cut four big leaves using the Big Triple Leaf die from Green Iridescent Shimmer Sheetz. Stick two to the card front with adhesive foam pads (as positioned below), and two inside the card.
_DSC0151
14. Finally, round off the corner with a corner punch.
Some of the products used:


Purple Onion Designs stamped Accordion Circle card

The challenge on the Crazy 4 Challenges blog this weekend, is to make a card on the theme of the season you are in. Being in England, we are in summer (thunder storms and violent rain the last couple of days!) and   I have been enjoying our garden (except during storms!) so decided to make a bright, flowery gardening card.
I used Karen Burniston's Accordion Circle Card die for the card base, stamps from Purple Onion Designs, and the wheel barrow and garden tools die set which is due out in a couple of weeks from Elizabeth Craft Designs (the flower dies and  Accordion Circle are from there too.)

I cut the stamped image from patterned paper, coloured over with Copics, and stuck it down with foam pads.

I trimmed some parts of the wheel barrow off, to create a top layer over another wheel barrow die cut. For the flower centres I used some peel-off stickers from Elizabeth Craft Designs.

The card front.

Some of the products used:


Saturday 21 June 2014

Crazy 4 Challenges Purple Onion Stamp Sketch Card

 We have a sketch challenge today on the Crazy 4 Challenges blog - here is my card based on it.

I used papers from the Front Porch collection, and stamps from Purple Onion Designs. (I drew the path by hand to match the house stamp.)
The dotted lines round the edges were made with a little wheel tool used for marking fabric (I think it's called a Tracing Wheel).

I used Cutter Bee really fine scissors to cut out all my stamps - I love them for really intricate work.
My little mouse was coloured with Copics.

Some of the products used:


Friday 20 June 2014

New Die Release at The Stamps of Life

There are a couple of new die set releases at The Stamps of Life today - here are some cards I made with one of the Single Hole Circle set. This is a really simple set, but so so versatile!!

For my first card I used the circle dies as flower centres, on a Flip-its card. The flower dies are by Brenda Walton, and the 'thanks' is from the Sizzix Elegant Stand-Ups die set (Links to the correct products are at the bottom of the post.)

For my second card, I used one of my favourite stamp and die sets by Stephanie Barnard at The Stamps of Life - 'phone4you'. I used the Single Hole Circles for the telephone dial. I love the look of the contrasting papers!

Lastly, I used some of the new dies for train wheels! 

Some of the products used:


Tuesday 17 June 2014

Karen Buriston's Oval Accordion Collaborative Album

Earlier this year Karen Burniston asked everyone in her Designer Challenge team to make one panel of an Oval Accordion Album, for a collaborative project. Our brief was to include a picture of ourselves somewhere, plus our name and blog address. Here is my panel...

I chose to use the All Seasons Tree (which also includes the clouds), and wanted to add one of my favourite card elements - bunting!
The flag die is from the Lots of Pops set, and the grass is from the Garden Bench set.
I created the frame layers by cutting out full panels, and trimming them down to the required sizes.

And here is the finished project!! So fun to see everyone's work in one piece, and
shows you can make Karen's accordion albums as long as you like!

Some of products used:


Family Photo Accordion Album - Karen Burniston's June Designer Challenge

I've had in mind to make an album like this for my Dad for absolutely ages, so I was pleased when Karen Burniston introduced the theme for June's Designer Challenge - to make a Photo Accordion Album.
(I still didn't manage to get it made in time for Father's Day though...)

Anyway, I used Karen's new Katie Accordion Card die set, which will be in shops around mid July. I love the shape of it! I cut four panels from turquoise card, then cut four more panels in patterned papers (trimming off the flaps) to decorate the panels.
The lovely little corner decorator die comes with the set too.

The first panel has a picture of my Granny and Grandpa (my Dad's parents). Grandpa was in the R.A.F. The second panel is of my Mum and Dad. I love this picture of them, taken before they were married.

I put holes in the frames with a Cropodile, and added eyelets, so I could string some twine through, and hang little banners (cut with a die from the Lots of Pops set), with sticker letters on.

The third panel has a photo of me and my siblings (I'm the oldest of four), and then the last picture is one of my Dad and Mum's Grandkids. This photo makes me laugh every single time I see it - not a single kid looks good in the photo! Complete shambles!! We need a more up-to-date grandkid picture though, as there have been twin girls and another boy born since then!
Finally, I rounded off the outer corners with a Zutter Round-it-all which is great for any thickness of cardstock.

I hope my Dad likes it - I'll get it in the mail to him today!

Some of the products used:


Karen Burniston's June Designer Challenge Photo Accordion Album

Karen Burniston's Designer Challenge this month is to make a Photo Accordion Album.
I worked on a bigger project for my Dad first (I'll blog that next!), but then thought it might be nice to do a smaller one for Scott's desk with a couple of recent pictures in it of our family.

I used the Circle Accordion die set for the base, and the Square w/ Circle Frames Edges set.

I included a picture of Scott and I at Tintagel Castle, Cornwall, from a trip we took at Easter this year - we were high up on the cliffs, and it was gorgeous.We had such a happy trip!
I added various wooden scrapbooky elements and stickers. I cut the large arrow from Wood Veneer paper, which is great stuff.

The other side is a picture of our four kids, taken on the same trip, at Paignton, Devon.
This was such a quick little album - the Accordion card dies are ideal for a little project like this.

Some of the products used:


Sunday 15 June 2014

New Chilly the Penguin Karen Burniston die card

Just wanted to share a card with you, using another of Karen Burniston's soon-to-be-released character dies - Chilly the Penguin. I used the Garden Bench Pop up die, and just glued two of the penguins to the arms of the bench.
I also used various other Pop it Ups dies: Agatha Edges, Katie Label, Heart from the Heart Pivot Card set, Bow from the soon-to-be-released Props 1 die set and snowflakes from the All Seasons Tree die set.

The scarf die comes in the Chilly the Penguin set, and I just cut two of them out, and raised up one part on little foam pad squares. I decided to glue on some massive googly eyes!

Some of the products used:


Saturday 14 June 2014

Stenciled Hoppy the Frog Oval Accordion Card

 The challenge on the Crazy 4 Challenges blog this week is to use stencils. I own a couple of different stencil sheets, and have used them with embossing paste in the past (see my homemade embossing paste recipe/tutorial here), so for a change decided to use ink with one of them to make my own background paper.

I used a small Tim Holtz sponge, and a couple of different green and blue chalk inks over a spotty stencil, onto plain white card. To get the white frames the right shape, I die cut whole oval accordion card panels, and trimmed them down round the edges and snipped out the inner parts.
I used Karen Burniston's Oval Accordion Card for the card base and die cut ovals, and her brand new Hoppy the Frog die set which will be available in the first couple of weeks of July.

I glued a few sequins over some of the stenciled spots, used an old stamp (coloured with Copics) for Hoppy's party hat, and I made my own lily pad by cutting a slit into an punched oval, embossing it, then hand cutting the dark green shadow for it.

The little fly also comes in the Hoppy the Frog die set, and I used word dies by Mariane Designs.

Some of the products used:


Thursday 12 June 2014

New Pop it Ups release from Karen Burniston - Hoppy the Frog & Katie Label Accordion card

Exciting times!! A fabulous new release from Karen Burniston, for Elizabeth Craft Designs, is due out in the first couple of weeks of July, and Karen has made a great video showing 10 of the 16 new dies in the release!
Here is one of the cards I made using some of the new dies - the Katie Label Accordion, and Hoppy the Frog. I love the Katie Label shape in its already existing Pivot Card form, and this new set adds some extra layer sizes, plus a lovely little corner pattern die.
Hoppy the Frog is also a great die set, with two main easy layers, some great extra dies like the little fly, and a lily.

I used Martha Stewart papers, and sentiment and flower stickers from Pebbles.
I just added the flight path of the fly with a fine Sharpie.

And who says frogs need to be green!!

Some of the products used:


Sunday 8 June 2014

Fancy Flower Labels Accordion Card

Hello! I have this triple panel accordion card and tutorial featured on the Elizabeth Craft Design Blog today.
 My Mum and Dad are coming up for their 40th Wedding Anniversary soon, (which must mean I am turning 40 next year... eeek!!) so I made this card for them.
I thought it would be fun to combine two different types of accordion dies - the Fancy Label, and the Circle.

Directions:
1. Cut out some double-sided adhesive, large enough for two Flower Labels 2 Peel-Offs, and stick one side of the double-sided adhesive onto white cardstock.
2. Stick the two Flower Labels peel-off stickers to the other side of the double sided adhesive. I used Els’s transfer technique to get my peel-off sticker nice and straight on the adhesive. Watch Els demoing this technique HERE.
3. Cover the Flower Labels and adhesive with Cool Diamond Microfine Silk Glitter, and rub in.
4. Colour the Flower Labels with Copic pens. If any pen gets onto the silver of the peel-offs, use a Copic Colorless Blender pen to remove it.
5. Cut out the two Flower Labels.
6. Use the Accordion Circle Card die set, the Accordion Fancy Label die set, and one of the Square/w Circle Frame Edges dies to cut out the pieces as shown below. For the floral borders, cut out full Accordion Fancy Label panels, snip out the centre parts, and trim off extra tabs.
7. Also die cut three smaller circles with dies from the Accordion Circle Card set, two of the smallest leaves from the Triple Leaf set, and two flowers from the Bunch of Flowers 1 die set. Stamp a sentiment on the smallest circle. Use a jewel brad for the flower centre.

_DSC0733

8. Adhere the Square/w Circle Frame edges with a glue pen, and adhere the rest of the big pieces with a glue runner.
9. Adhere the leaves with a glue pen, and the assembled flower with wet glue.
10. Lastly stick the three panels together. Snip off the small side tabs on both of the Fancy Label panels, and use an extra small rectangle of card stock to attach the two panels together which have no tabs on either of them, as shown below. (The tab still remaining on the circle panel is used for the other attachment.)

_DSC0760

And you are done! Sit back and enjoy the sparkle!

_DSC0746


Some of the products used:


Saturday 7 June 2014

More Hotties from The Stamps of Life...

The monthly club set at The Stamps of life is called hot4balloons, and today, an additional co-ordinating stamp set is being released - patterns4airballoons.

Here are a couple of cards I made with the two sets, and accompanying dies.

For the first, I made a stencil by cutting out a paper cloud, and repeatedly sponging ink over it.

I created patterned balloons with some of the stamps in the new set, for this card.

 And lastly, I used the exclusive Flip-its card - love the clouds that come in the die set! The bow is by Tim Holtz.

Some of the other products used:


Crazy 4 Challenges Male Card

The challenge this weekend at Crazy 4 Challenges is to make a card suitable for a boy or man... admittedly mine does have some pink in it, but I'm OK with that - hard enough not to use any flowers, ribbons, butterflies, sparkly stuff etc...

I used a Sizzix Stand-up die set for the card base, which comes with dies that cut perfect layers to decorate it with. The Zig Zag circle die, and banners are also from Sizzix, and the circle stamp is from The Stamps of Life.
A pretty quick and simple card.

Some of products used:


Sunday 1 June 2014

June's Club Stamp Set Release from The Stamps of Life - Hot Air Balloon Cards

I'm very excited for June's new Club Stamp Set release at the The Stamps of Life - hot4balloons!!
If you're in the Die Hard Club, you will also love the matching dies! (available later in the month if you aren't in the Die Hard Club.)

Here's my first card made with the set... there are some great sentiments that go with the balloons, and the cloud dies are super! I used a Flip-its card for the base, a couple of Sizzix border dies for on the balloon and at the bottom of the card, and Fancy Pants 'Happy Go Lucky' papers. (Product links at bottom of post.)

There are dies which cut the balloon part out perfectly, or as in the card above, leaving a border around the entire balloon and basket. The gorgeous little sun is also part of the die set.

Here I used a Sizzix Stand-ups die, and a couple more of their border dies to decorate the balloon and lower border.

 And lastly, here I created my own patterned balloons using more stamps in the set, and lovely vivid Stephanie Barnard inks.

Some of the products used: