Tuesday, 30 September 2014

Pop it Ups Gingerbread House Pivot Christmas Card

Some time back I made a gingerbread house card with some of Karen Burniston's dies for Sizzix, which are now discontinued, so I thought I'd make a similar style card using her beautiful new Elizabeth Craft Design Pop it Ups dies... 
I used the House Pivot Card die to create the dimensional cut, and then the Holiday House die set for the house pieces. The trees are from Karen's Evergreen Pivot Card set.

The background card stock is from First Edition's Nordic Christmas 12x12 pad, and I added some snowflakes to the design, using the snowflakes die from the All Season Tree set. 
All of the white 'icing' details on my gingerbread house, trees and snowflakes are Liquid Pearls.
I cut the wavy snow using a die from the Outdoor Edges set, and embossed the pieces with Elizabeth Craft Design's Lots of Dots folder.

The card stock I used is only one-sided, so I added another layer of patterned paper to the outside of the card, and also covered over the gaps left by the house die cut.
I wrote the 'Merry Christmas' with a calligraphy dip pen and Ecoline liquid watercolour ink.

I hope you like the card... I loved making it, and it reminds me of happy, traditional Christmases!

Links to some of the products used:


Monday, 29 September 2014

A couple of Stampin' Up and Sizzix Christmas Cards

Just a couple of fairly simple cards that I made for a card class with some friends...

This first one uses the Tim Holtz Sizzix Wreath, and Stampin Up 'Noel' die, plus an old Cuttlebug embossing folder.

The second one uses the new set from Stampin' Up 'Festival of Trees' plus the matching punch, plus Stampin' Up label and star punches, with a Tim Holtz stamped sentiment.
The embossing folder is an old Sizzix one, I think.

Some of the products used:


New Home Stampin' Up Katie Label Pivot Card

It's been ages since I've had a chance for a good play with craft stuff, plus I've not been feeling great lately, so I really enjoyed making this card!

I used two background stamps from Stampin' Up (Handcarved and Hardwood) onto a plain white  card blank, then die cut it with the Katie Label Pivot Card die. I then used the die again on some white card stock and cut out the white label parts, and glued them on.

I used the Stampin' Up set 'Life's Adventure' for the houses, and coloured them with Copic pens, and cut down some of the houses to different heights. I also cut out some smaller details from the houses and layered them on with foam pads, so they are quite dimensional.
For the 'Congratulations', I used another Stampin' Up set 'Occasions 4 You', then used gold ink and a calligraphy dip pen to write 'on your new home'.

I added some card stock to the back of the card to fill in the gaps, then layered on some patterned paper from My Mind's Eye 'Oxford Lane' 6x6 pad, for the card front.
The yellow card and ink is 'Hello Honey' from Stampin' Up.

Some of the products used:


Friday, 19 September 2014

Sizzix Triplits Die Sets - Gifts, Cupcakes, Balloons and Tags Cards

Stephanie Barnard has some lovely new triplits die sets for Sizzix - here are some cards I made a while back when I first got my hands on some of the sample dies!

I love all the combinations you can make with these Triplit die sets - there are loads of shadow/layer/embellishment combinations you can come up with.
I also think they're a good price (see the products links at the bottom of this post.)

Here are a couple of cards using the Gifts set first, along with the Sizzix Flip-its Square #2 die set, and a new stamp set from Sizzix for the 'Merry Christmas'.
(Sizzix's picture of the set)

Here are a couple of cards using the Triplits Cupcake set, along with the Royal Stand-up die set, and the Elegant Flip-its die set, below, plus Sizzix Border dies set.
The 'happy birthday' is from the Regal Stand-ups die set.
 (Sizzix's photo)

Cards using the Triplits Balloons set, and new Sizzix stamp sets.
 (Sizzx's photo)

And finally a couple of cards using the Triplits Tag die set. This one comes with the cutest ever mini die shapes!
 (Sizzix's photo)

Some of the products used:


Monday, 15 September 2014

Stephanie Barnard's Sizzix Framelits Cars Cards

 I just wanted to show you some cards I made using one of Stephanie Barnard's lovely stamp and die sets for Sizzix, which she has recently released at The Stamps of Life.
It's the 'Sizzix Framelits Die Set/w Stamps - Cars' set, and I love it!
This first card uses the Elegant Flip-its die, and stamps and dies from the new set.

Here I just used the car die, along with a washi tape road, and stamp from the pinwheels2stamp set.

I used the little car die that comes in the new set to create a border here (stars are from Tim's Holtz's Crescent Moon and Stars die), as well as a stamp from Sizzix, and the Square Flip-its 2 die for the card base.

Lastly, I used car dies in the same colour as the card base to create a kind of embossed car look.

Some of the products used:


Frankenstein's Monster Halloween Spiral Circle Pull Card - September Designer Challenge

I have a really quick card for Halloween to share today, using Karen Burniston's Spiral Circle Pull Card.
I like that you can use the SCPC die anywhere you want on your card design - here, I placed the die off-centre so there was room for a whole face on the right-hand side when you open the card, whilst keeping the left-hand side narrower.

I used a circle from Karen's Clocks and Gears die set for the perfect sized centre circle, and various other circle dies and punches for the other eyes/pupils.
I used a kind of leather-textured paper for the hair which I cut by hand.

I hand cut the chin piece (stuck down with foam pads), teeth and staples, and used a punch for the edge of the bolts.
I edged all the green pieces with black ink, sponged on.

Some of the products used:


Sunday, 31 August 2014

Elizabeth Craft Designs Monthly Challenge - Waterliles Ring Accordion Card

 The August Challenge for our Elizabeth Craft Designs Team is to create an Asian themed project.
I love the Waterlilies peel-off stickers by ECD, and decided to do a triple ring accordion card with them.
I cut the coloured ring panels, and embossed them with ECD's Damask embossing folder, then used the Ring Accordion die to cut Shimmer Sheetz centre panels in matching colours.

 I stuck the peel-offs onto watercolour paper, and coloured them with a waterbrush pen, and some Tombow Dual Brush pens. When they were dry, I cut them out and stuck them to the Shimmer Sheetz with little foam pads.

The card front.

Finally, I used a Sizzix stamp with VersaMark ink and gold embossing powder for the sentiment.

Some of the products used:


Saturday, 30 August 2014

Crazy 4 Challenges Stampin' Up Flower Punches Birthday Card

My final challenge as hostess this month at Crazy 4 Challenges, uses a shabby chic picture for inspiration, and here's my card based on it.
I used a Stampin' Up woodgrain stamp for the background, and three Stampin' Up flower punches to make the layered flowers.
I inked the edges of each flower, and shaped them a bit using a ball tool, leaning on a stiff foam pad.
I hand cut the larger leaves, and used a Martha Stewart punch for the smaller leaves.
The buttons are from Stampin' Up, and the swirls are a MFT die.


I used a die and a stamp by Tim Holtz for the sentiment banner, and finally, glued on some sequins.


Links to some of the products used:


Thursday, 28 August 2014

Purple Onion Designs Camera Sizzix Flip-its Birthday Card & SALE!

I just wanted to remind you that Purple Onion Designs have a 25% off ALL STAMPS Anniversary Sale on at the moment, running till 31st August!! 
The stamps I used on this card are all from Purple Onion Designs.

I also used the Sizzix Regal Flip-its die for the kraft cardstock base, and the co-ordinating Regal Labels Framelits die set for the pale pink paper layer.
I stamped the camera image onto some different papers, and just hand cut out different parts and layered them up with foam pads.


The papers are from American Crafts' Flea Market 6x6 pad.


Some of the products used:


Monday, 25 August 2014

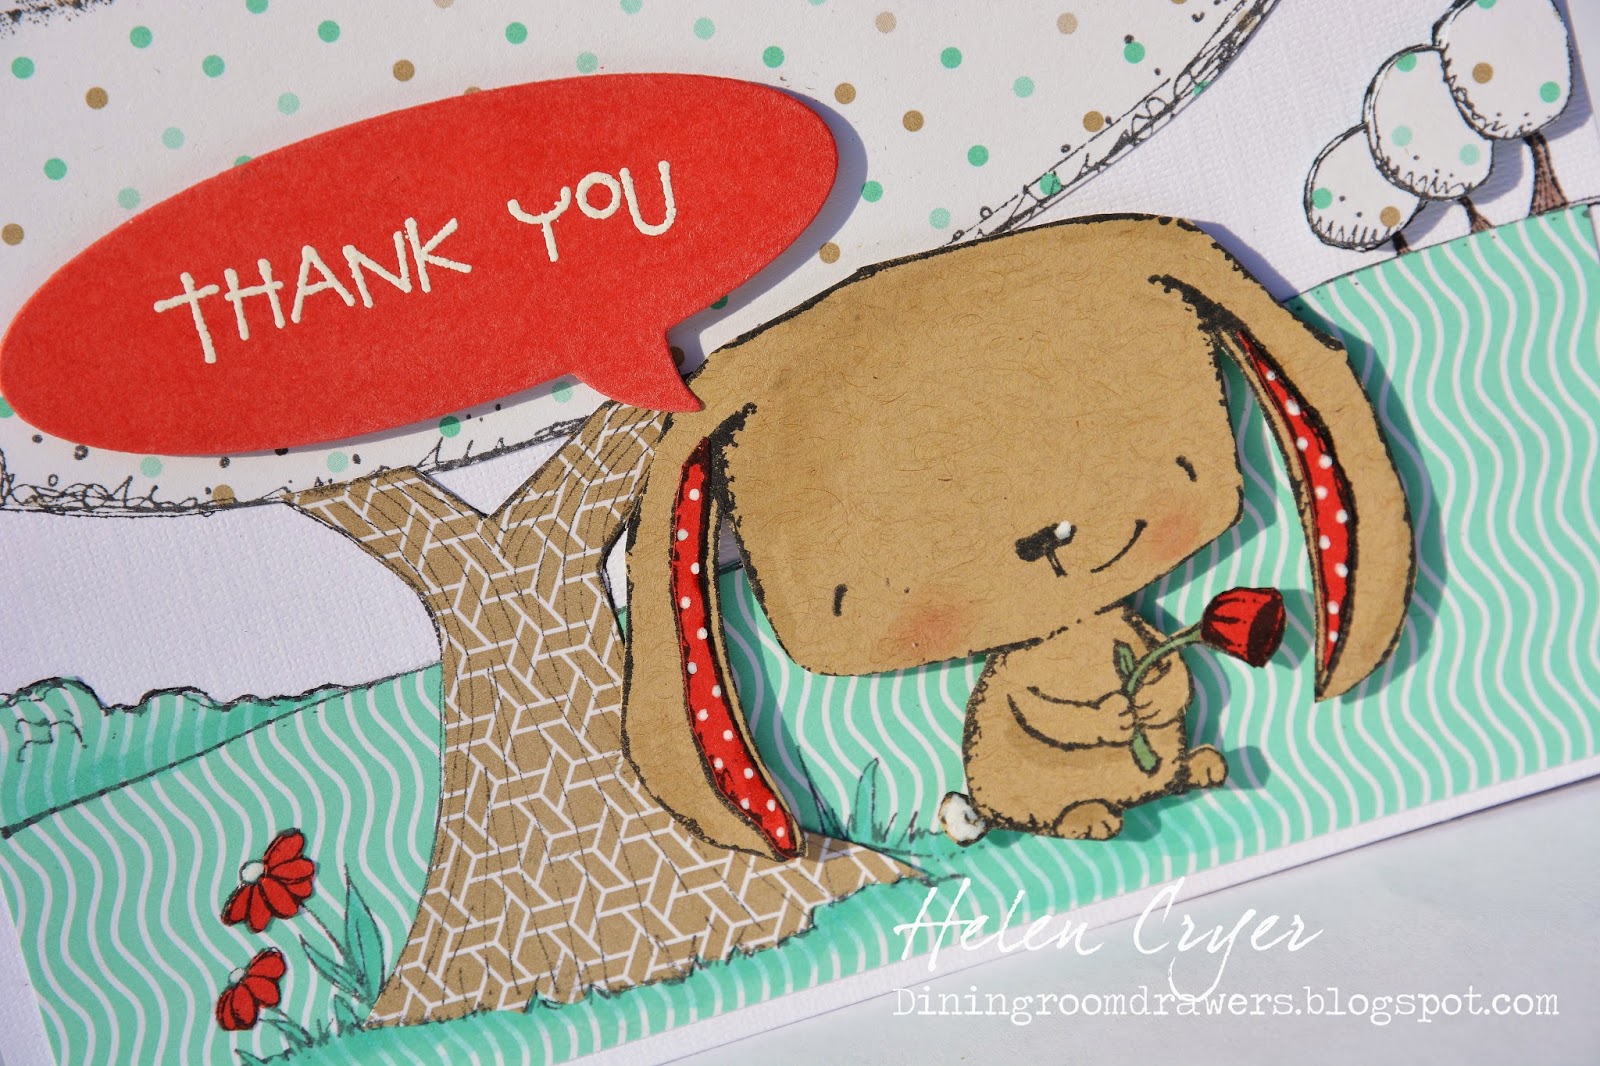
Stacey Yacula & Purple Onion Designs Stamps Thank You Card

Hello! Here's another card using stamps all from Purple Onion Designs - and a reminder that they have their Anniversary Sale on at the moment, with 25% off ALL STAMPS till 31st August!


I stamped onto various Stampin' Up papers, and kraft cardstock, then cut out the various elements and layered them up.
I stamped the sentiment with VersaMark ink, then heated up white embossing powder on it.
The speech bubbe die is from Stampin' Up.
I added a few subtle shadow details with Copic pens, and a few white details with white Signo Uniball pen.


Links to some of the products used:


Saturday, 23 August 2014

Elizabeth Craft Designs Crystal Flowers Spiral Circle Pull Card Tutorial

Hello everyone! Today I'm on the Elizabeth Craft Designs blog with a Spiral Circle Pull Card tutorial for you. 

I was browsing through my patterned paper pads, and a turquoise and gold paper caught my eye, and was the inspiration for this card. Someone asked me a while ago where I get the inspiration for my cards, and I'd have to say it usually does comes from patterned papers - the colours and style of pattern always seem to create a 'theme' for the rest of the card.

DSC_0518

Directions for making the card:

1. Cut out a pale turquoise piece of card stock measuring  5.5'' x 8''. Fold it in half, and open out again.

2. Use the Spiral Circle Pull Card die to create the additional folds and half-circle cut.

3. Cut two strips of patterned paper, each measuring  5.5'' x 1.5'', and adhere them to the outer edges of the card.

4. Cut a piece of pale turquoise card stock measuring 5.5'' x 2.5'', and emboss it using the Trendy Tiles 1 Embossing Folder. Adhere it to the right-hand side of the card, next to the patterned paper.

5. Cut out a large and small flower from turquoise glitter card stock, using the Crystal Flower Set 1. Cut out a large and small flower from gold card stock, using the Crystal Flower Overlay Set 1.

6. Cut a circle from contrasting patterned paper, using the circle die from the Clocks and Gears die set, and another smaller circle using the circle die in the Spiral Circle Pull Card set.

7. Cut another circle using the circle die in the Spiral Circle Pull Card set, from gold cardstock, and then die cut the Thank You Stand Up Helper into the centre of it. Trim away the top half of the circle, so you are left with a piece as shown at the bottom of the picture below.

DSC_0507

8. Glue the centres of the Crystal Flower Overlays onto the glitter flowers of the corresponding size, and add a brad 
through the centres.

9. Adhere the larger contrasting patterned paper circle to the front of the floating circle, and glue the layered flower on top.

DSC_0525

10. Inside the card, adhere the smaller patterned paper circle, with the 'Thank You' piece on top.

11. Cut four Big Triple Leaf pieces from gold card stock. Adhere two to the card front, and two inside, as shown below.

12. Glue a sheer ribbon bow to the leaf stems on the card front.

DSC_0531 (1280x850)

13. Finally, add some Lace Fan 1 Gold Peel-Off Stickers down the sides of the patterned paper strips, and also below the 'Thank You'.

DSC_0535

Some of the products used:


Crazy 4 Challenges Bird Card & Purple Onion Designs SALE

I'm hosting at Crazy 4 Challenges again this week, and the challenge I set is to use an animal in your card (though no bears or bunnies!)
I decided to use this cute little bird stamp from Purple Onion Designs (as are the bird house and sentiment stamps.)

Talking of Purple Onion Designs - they have a superb 25% off ALL STAMPS Anniversary Sale running from 22nd till 31st August!! I love all their stamps, so take a look!


I used Stephanie Barnard for Sizzix's Fancy Frame Flip-its die set for the card base and patterned paper layers, plus matching Framelits die set for the orange chevron layer.
The speech bubble die is from Stampin' Up, and the papers are from Studio Calico's 'Print Shop' 6x6 pad.
I cut the bird and birdhouse layers out by hand.


Links to some of the products used:


Monday, 18 August 2014

Karen Burniston's August Designer Challenge Hoppy The Frog Accordion Card

 Karen Burniston's August challenge for her Design Team is to use any of her character dies... Hoppy, Poppy or Chilly, from Elizabeth Craft Designs.
I chose to use Hoppy on a Fancy Label Accordion card base.

 I made patterned paper frames for the card panels, using the Fancy Frame Edges die set. All the papers are from a lovely 6x6 pad from My Mind's Eye, called 'Oxford Lane'.


  I layered Hoppy with small square adhesive foam pads, and hand cut some 'jump lines' for him.
I also added little bows in each of the corners, using a die from Karen's 'Props 1' die set, and some adhesive pearls.


On the other panel, I cut a label (another die from the Accordion Fancy Label set) and stamped 'hello' with VersaMark ink, then heated some white embossing powder on it. The stamp is from Pink Paislee's 'Hello Sunshine' collection.
I also added a couple of little flies from the Hoppy the Frog die set.


Finally, on the card front I added a checked paper frame, using the Accordion Fancy Frame die to cut it, and snipping away the extra bits.


Links to products used: