Saturday, 31 March 2012

Baby Quilts for the Hospital

This past week I finished off a couple of little flannel blankets, as part of a project which the women at church have been doing - to make new quilts for the Intensive Care unit for premature babies at the local hospital. We made about 40 altogether, I think. One of the women donated all the fabric from her extensive collection (!), and I made the zig-zag one, another friend pieced up the chequered one, and I finished them off. 
 We had to bind them by folding over the backing fabric. I haven't done that kind of binding before, but it turned out OK, and I got to use my nice scalloped stitch to secure it.
All soft and ready to go.

Saturday, 24 March 2012

A couple of bits

Nice and simple birthday cards for twins who's party one of my sons went to today. The alphabet letter stickers on the little tags are microscopic!! Didn't realise quite how small they were when I was ordering them!
I am swamped with tonnes of beautiful fabric at the moment. I bought several packages from America (don't ask me about the £40 customs fees...) and I am happily chopping it into little pre-cut patchwork squares packs, and also making die-cut appliques. I took delivery of a 25 metre roll of fusible webbing today, so that should keep me going for a while! I have been selling them.
 Some of the applique packs I made up today. (And my new Cath Kidston jug - took a nice little trip to their factory outlet shop yesterday!)
I was quite excited to see a couple of Youtube tutorials recently, on cutting out iron-on fabric shapes with a Cricut machine. You have to iron on the fusible webbing first, then some people lay it onto the cutting mat, fabric side down (though I think you would get through a lot if mats this way - they would lose their stick pretty quickly), and other people spray starch on the fabric, iron it, then it is OK to cut it fabric side up. I'm dying to try it out, but as luck would have it, my Cricut machine died last week! I managed to get a new machine today on ebay though, for £50, so I'll have the chance to experiment soon enough!

Sunday, 18 March 2012

Mothers' Day Hydrangea Cupcakes

I made these hydrangea cupcakes for my Mum for Mother's Day - my family had a get-together today - 19.5 of us - great fun!
After the cakes were cooked, I scooped out some of the cake and filled it with jam, then piped on the flowers. I made up some icing, from butter, icing sugar, melted white chocolate and a little double cream. I split the mixture, colouring half in lilac, and half in the turquiose (it was meant to be blue, but the yellow of the butter changed it to a kind of toothpaste colour! I know that I could use shortening to keep the base icing white, but I really prefer the flavour of butter too much.) The two colours then got put in the same piping bag, and I hoped for the best! I quite like how they turned out.

Wednesday, 14 March 2012

More Pink Cupcakes and a New Stand

Tom had a friend over last night, and they asked if they could decorate cupcakes, so I made up a batch, and we all decorated some. I wanted to get pictures of the kids' ones (which ranged from pure black with orange stars, a French flag, a Scottish flag and some big fat fondant icing boulders) - only the kids took great delight in shoving them in their mouths before I could get my camera.
Here are mine anyway. I got to try out my new lattice embosser, and silicone brooch mould (both bought on ebay). I put on soft decorative balls, because I can't stand eating hard crunchy ones, especially when there are lots on each cupcake.
 These are my favourite! I love making the little rosebuds - using a star cutter for the little leaves.

 This is my new cake stand (also bought on ebay). I like that you can use as many layers as you need, it packs away flat, and you can fit between 25 and 52 cupcakes on it, and also see through each layer to the cupcakes below.

Monday, 5 March 2012

Red Velvet Cupcakes

I thought I should try and expand my cake repertoire, so had a go at some Red Velvet cupcakes today. (I had this idea about 40 minutes before I had to do the school run, so they were somewhat hurried...)
I used a pretty standard recipe, similar to that in the Hummingbird Bakery book, and they were a lovely light texture, but I don't think the flavour is anything to shout about - I still prefer basic Victoria Sponge cupcakes, or chocolate ones. I topped them with a (very runny!) cream cheese frosting.

Saturday, 3 March 2012

'Happy Temple Mission' Card

My Mum and Dad started their Temple Mission this week! They've been settling into a flat near the Preston Temple, where they will be staying 2 weeks out of every 8. Funnily enough, there aren't many 'Happy Temple Mission' cards in the local card shop, so I made my own! 
This is based on the colours over at the Daring Cardmakers this week. I like that the challenge asked for 'a touch of gold'! My touch of gold is the Angel Moroni on the spire of the temple. (In case anyone is curious about our religion, you can click the link to the right...)

Tuesday, 28 February 2012

Mojo Monday Birthday Card

A card based on the square layout over at Mojo Monday.
I love the matching stamp set for the Decorative Label punch from Stampin' Up.

Monday, 27 February 2012

Card Patterns Birthday Card

A couple of cards made using the Card Patterns design below, flipped upside-down.
I used Stampin' Up 'Heart to Heart' and 'Decorative Label' punches, and their 'Perfectly Penned' stamp.


Friday, 17 February 2012

Vanilla and Chocolate Cupcakes

My parents came on Valentines day, and the kids were on holiday from school. We had some cupcakes at lunch...
 Last night I went to a training evening, and made some cupcakes for the refreshments. I find it very relaxing decorating them, though less so clearing up the monumental amount of mess I have created afterwards...
I used vanilla butter icing, and a chocolate cream cheese icing, plus some rolled fondant.
 Here they are all tucked up in my new Cupcake Courier. The only thing I think lacking with the design of the carrier, is a couple of lowered points each side of the cupcake holes, for you to get your fingers in and lift out the cupcakes. Still really happy with it though.
 Another few cupackes I made, using a Cuttlebug embossing folder. I've also been trying to improve on my fondant rose making. I now cut out 6 or 7 circles, flatten them some more, and stick them together with water. The first petals I add curling inwards, and the last few curling outwards.

Saturday, 11 February 2012

Cupcakes and The Cupcake Courier

I had a fun (and very messy) day yesterday making cupcakes, for refreshments for my book club meeting last night.
Here are a few that were left over this morning!
I should also mention that I got the polka dot and stitched textures on my cupcake tops by rolling icing onto embossing folders (- designed for using with cardboard in die cutting machines, for card making). These only cost about £3.50 each, rather than buying expensive textured rolling pins. I buy embossing folders from here.
Also in the post today I took delivery of a 'Cupcake Courier'. It's fantastic!! A great alternative to carrying loads of old 'Celebrations' tubs with only a few cupcakes in each. This holds 36, and my younger boys and I had a good time swinging the case around to test how much of a bashing the cupcakes can take without being damaged. (The answer is quite a lot... you have to virtually turn the whole thing upside down to do any damage.) I got it from here.
 I was also pleased with the depth between each layer - you can have the icing quite tall and it will still fit in. (Approx. 6cm in total from the bottom of the cupcake.)
 And a nice big chunky, airtight lid.

Cards

I needed to make a lot of cards this week - to send to the girls in the Youth programme which I help run. Here are a few I made, based on a design I saw on Pinterest, by Joy Taylor.

Saturday, 4 February 2012

String Quilt Cushion Cover (Tutorial)

I haven't been well this week, and have spent far too long looking at lovely stuff on Pinterest, but today I was itching to make something.
I had seen a tutorial for making string quilt blocks which used paper piecing, but I wanted to have a go with a fabric base in order to make four blocks for a cushion. Here's what I did:

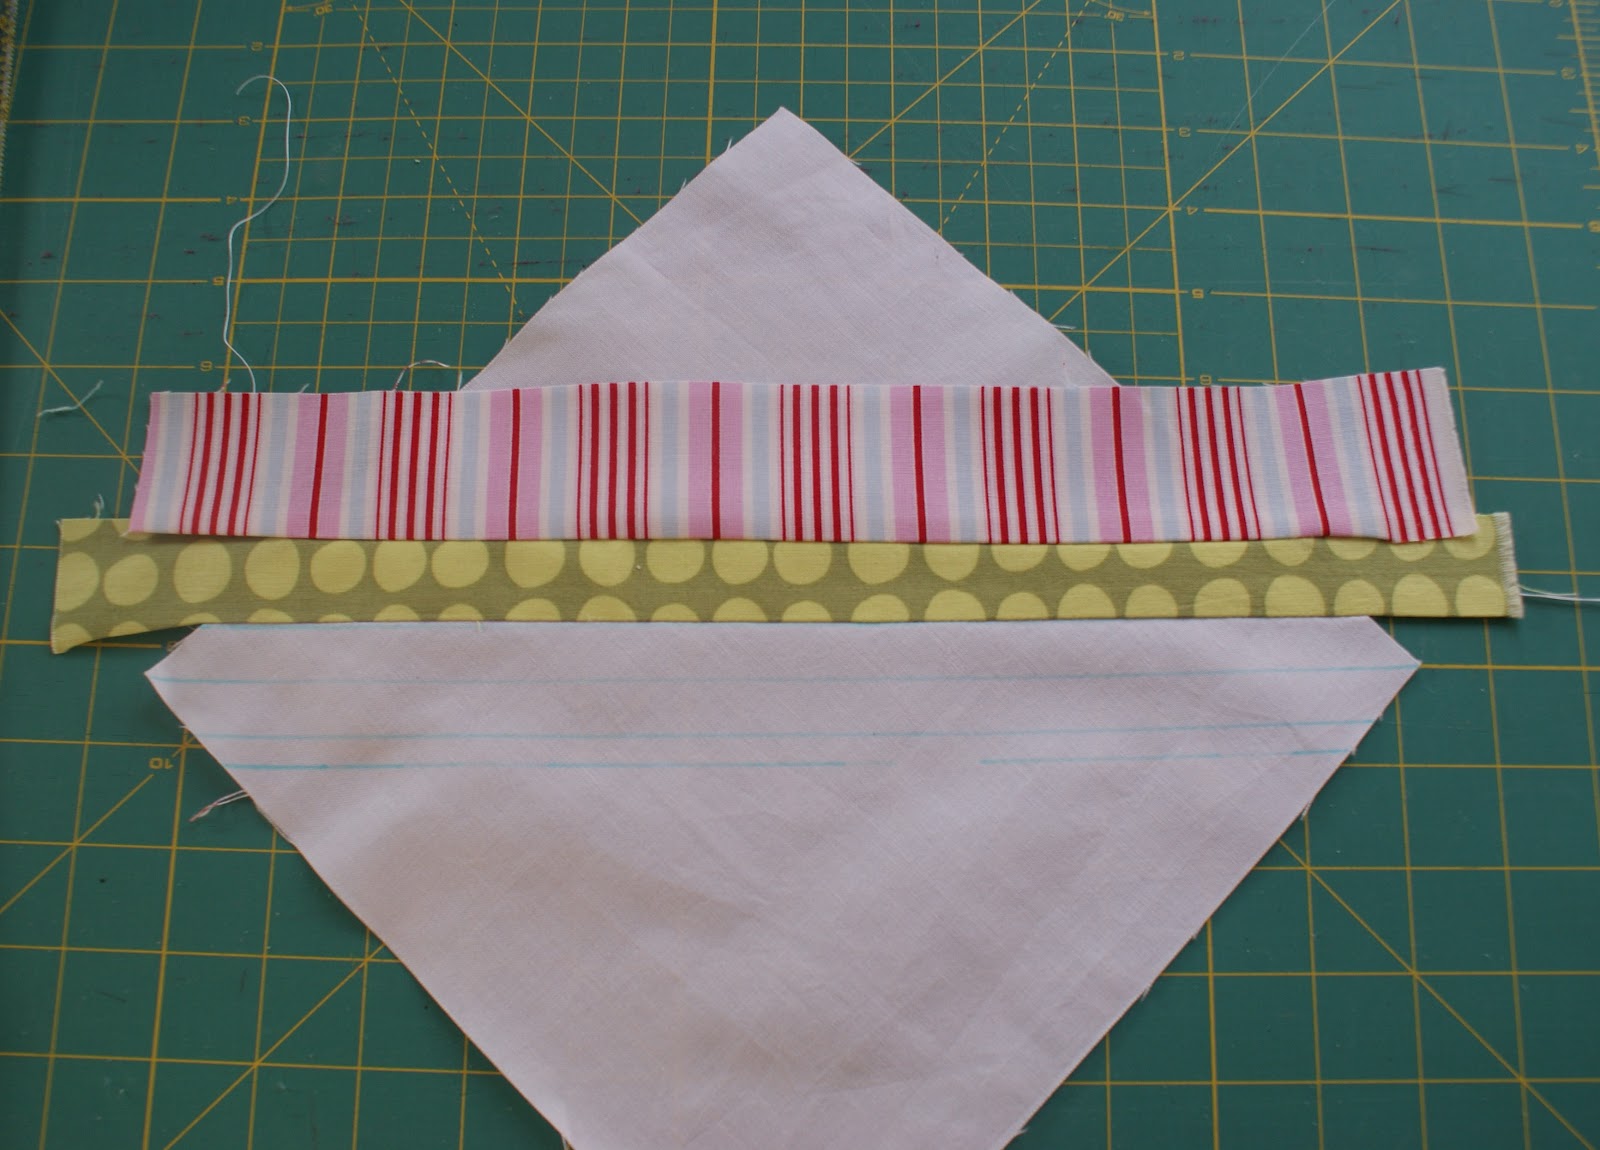
I want my final blocks to measure 8'' when made up, so cut 4 squares of plain white fabric, to 9'' (in theory I only need 8.5'', but I want to allow for a bit of extra trimming space.)
In water soluble pen I drew across the diagonal, then drew 2 lines 1/2'' either side, then 2 more lines 1/4'' out from those.
I want to end up with a 1'' white stripe down the centre of each block.

I cut my first fabric strip for attaching. I want my stripes to remain parallel to the central stripe, so am cutting each one with parallel edges.
I lined up my first strip, face down, neatly to the very top blue line I drew. This is pinned in place, then sewn with a 1/4'' allowance (which means my first strip is now attached along the blue line that was 1/2'' from the centre line.)

 Lift up the attached fabric and iron.

Lay your next strip, face down, matching one edge to the top of the previous strip.

This is again sewn, and ironed upwards.

Carry on in the same way, till that half of the block is completely covered with strips of fabric, then start on the other half in the same way.

The first strip on the next half is again aligned with the top blue line that was drawn on. In this way I created the 1'' white centre stripe that I wanted.

Keep going, lining up edges, pinning and sewing!

When the block is covered, flip it over and trim it. I measured up the diagonal line on my ruler with the centre of my white stripe, then trimmed the whole thing to 8.5''

I love how the back of it is so neat! So unlike my normal quilt top backs!

Four blocks later...

I sewed them together with 1/4'' seam allowances, and considered using it just like this for the cushion top, but decided to quilt it, with thin wadding and muslin on the back.

I love it when it goes all bumpy!

I then trimmed the edges again.

For the cushion back, I overlapped two pieces of heavier fabric (with raw edges turned over a couple of times, ironed then sewn) right side up, to make an envelope opening.

This was all pinned in place, then I sewed 1/4'' in from the edges all the way around.

My final job is to add binding, in the same way as I would to a quilt.
(I did actually sew on some bright red binding, but it made it look like a Christmas cushion, so I cut it all off again!
I'll be binding it in white I think, shortly...)
The final cushion is here.